

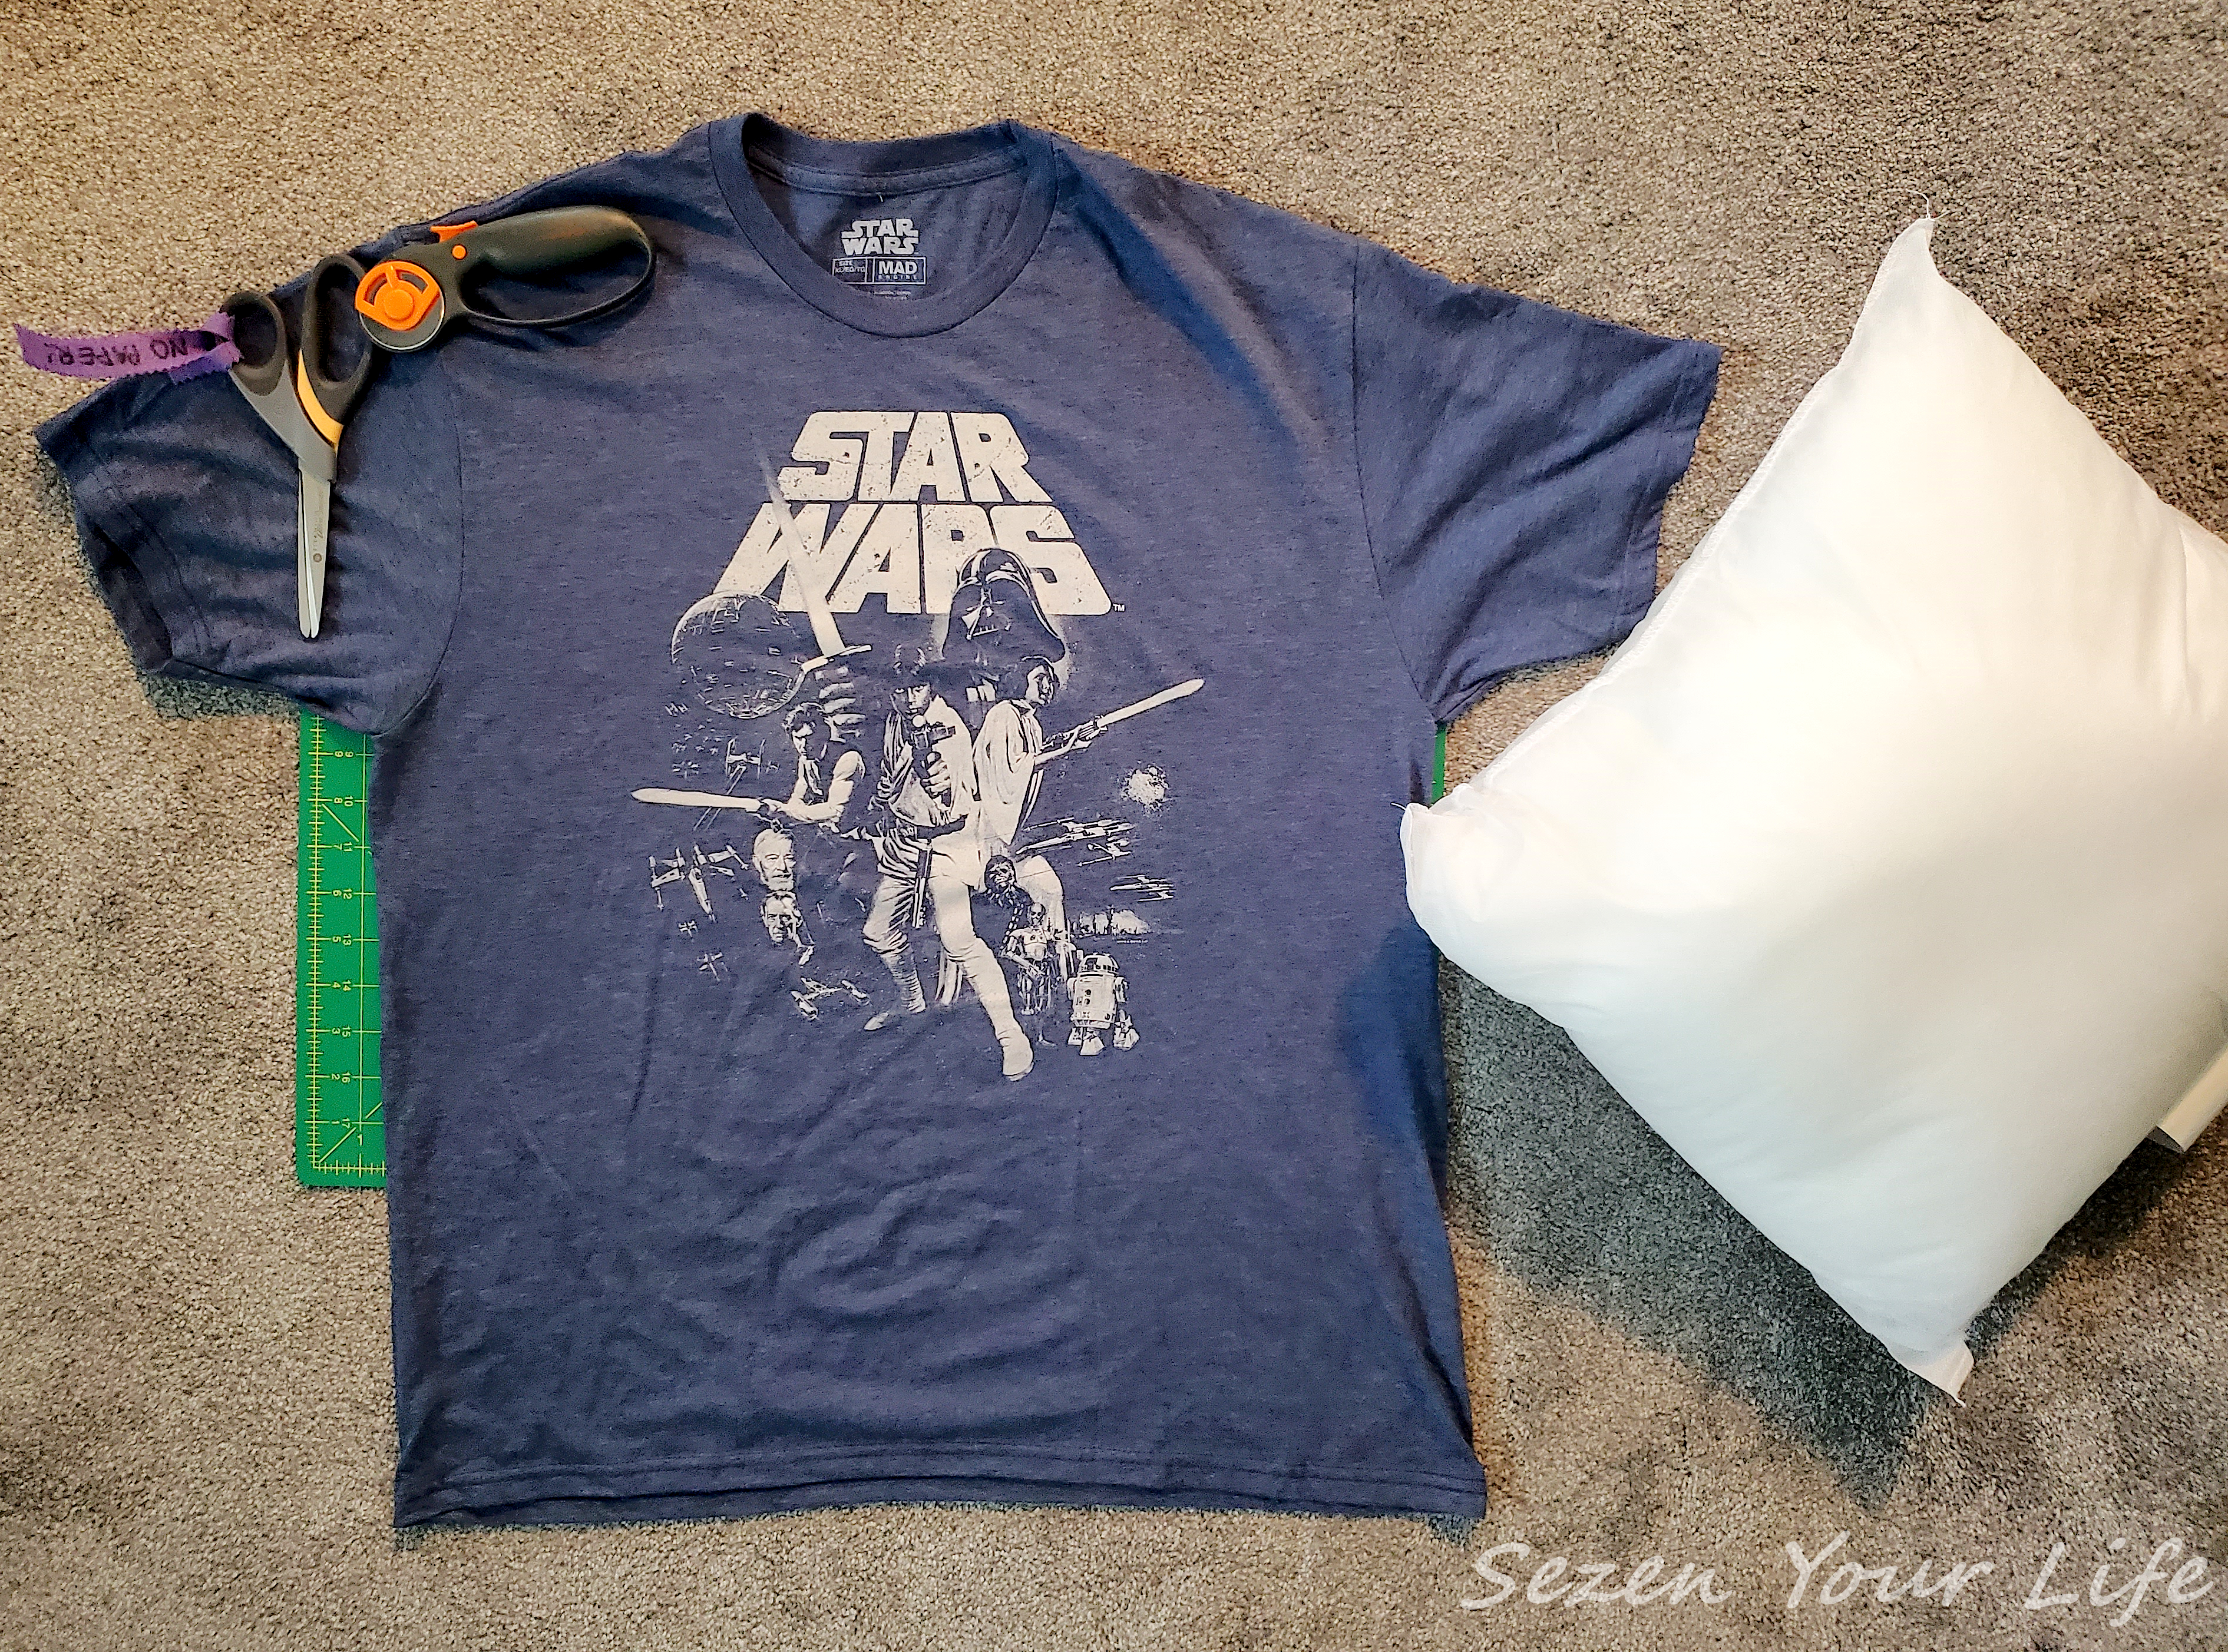
An old favorite shirt doesn’t fit quite right anymore; a new gift from a well-meaning aunt is a little snug; your dog chewed a hole in the sleeve… Whatever the reason, you find yourself with a pile of shirts that you don’t wear, but you’re not willing to part with them.
T-shirt quilts, similar to the Blessings Blanket I made for my daughter, are a popular choice. But if you only have a few shirts to work with, and/or limited time, these Pillow Covers are the perfect choice for re-purposing those tops. Unlike a quilt, these Pillow Covers can be made in under an hour and even beginners can make them.
If you have been wanting to start sewing, this is the perfect project for the novice, the young, and those of us wanting to sew but with very little time to devote to finishing a creation. These could actually be hand-sewn if you don’t have access to a machine. You’ll also see me generally using a rotary cutter and cutting mat, but fabric scissors would work just fine.
This is probably the most forgiving project I have ever worked on. So don’t be afraid to make mistakes, jump right in! You’ll be proud of your work and happy to have accomplished something that looks great, but is so easy to do.
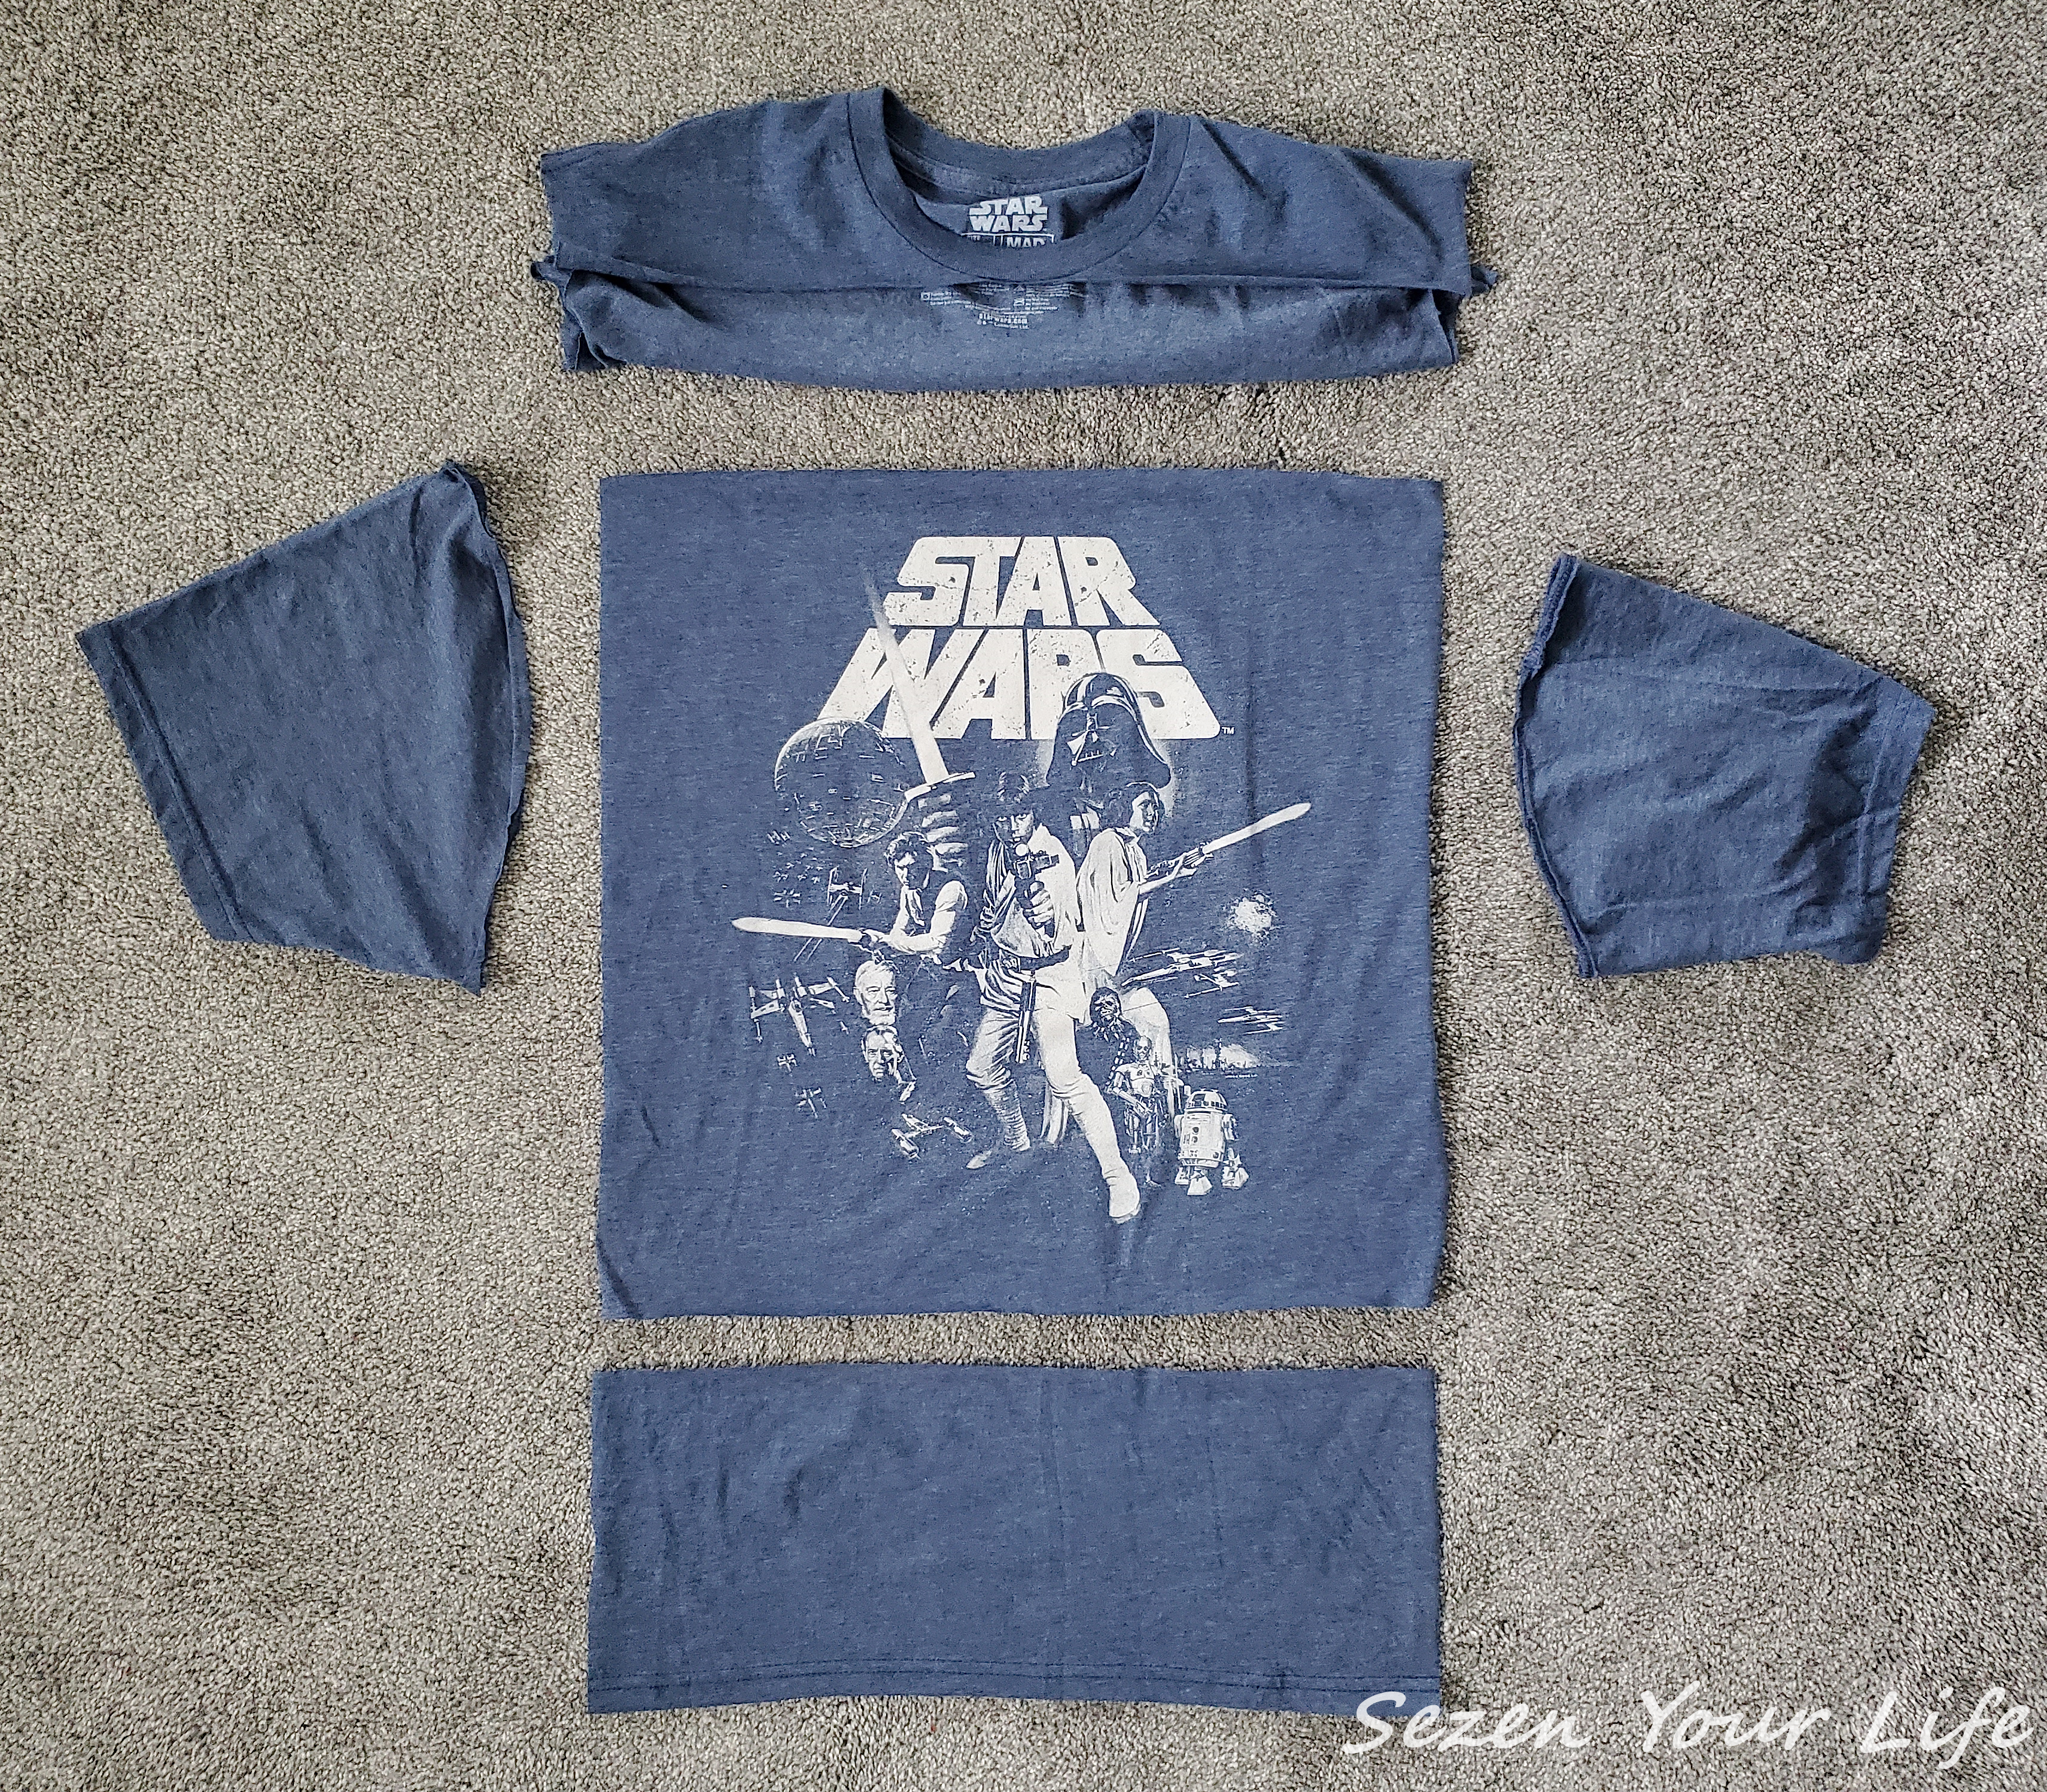
Start by laying out your shirt. Using fabric shears (or scissors) divide the shirt in half (front from the back). Cut both sides from the bottom hem to the arm pit. Cut off the sleeves as well.
Decide how big you want the cover to be. The Star Wars image on this shirt was quite large. My pillows are 18″x18″ and I cut my fabric to be that same size (18″x18″). The final sewn cover will be close to 17″x17″ with the seam allowance. This slightly smaller size helps the pillows to look full. If you prefer a flatter appearance, measure the fabric an inch larger than your pillow size.
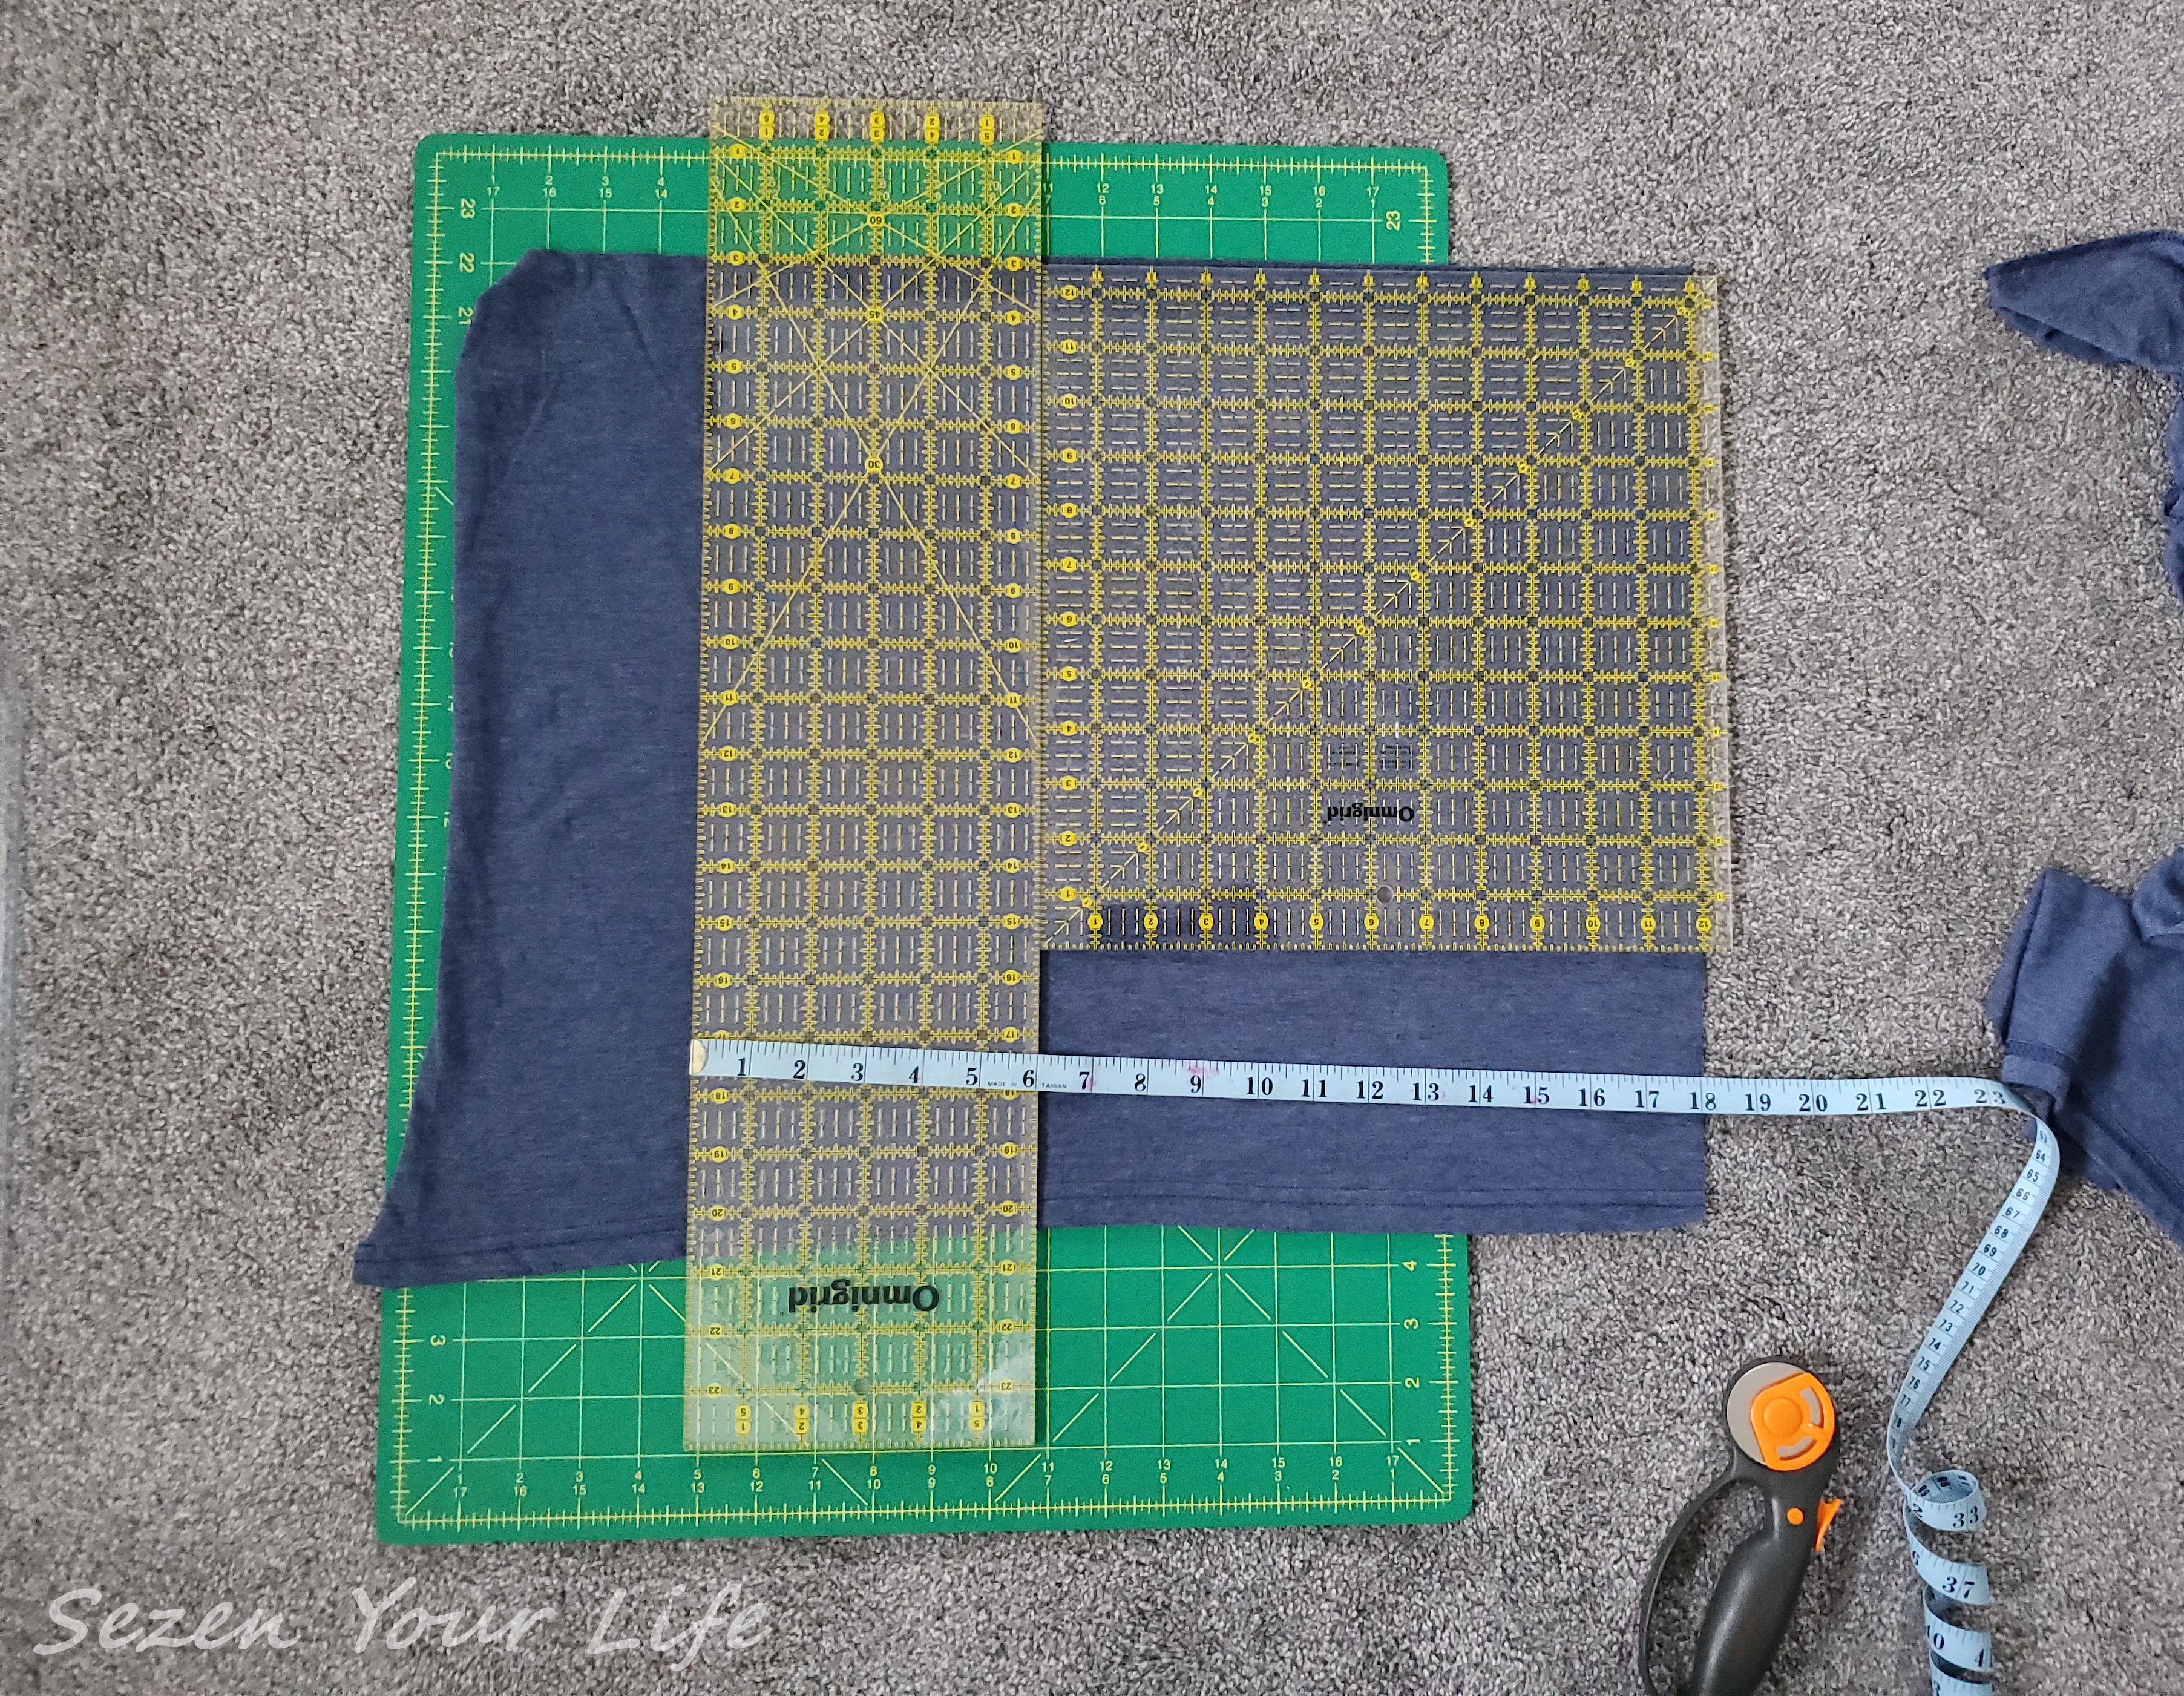
I had the benefit of using cutting guides, but this can be done by simply measuring and marking the fabric or creating a template from paper and following that with scissors.
The cool thing about this style of cover is that it doesn’t require any sort of fancy closure, no zippers, buttons, nor blind stitching. When you cut the front panel with the logo you wish to display, save the bottom section with the hem. This will be part of the back panel to create and envelope style cover.
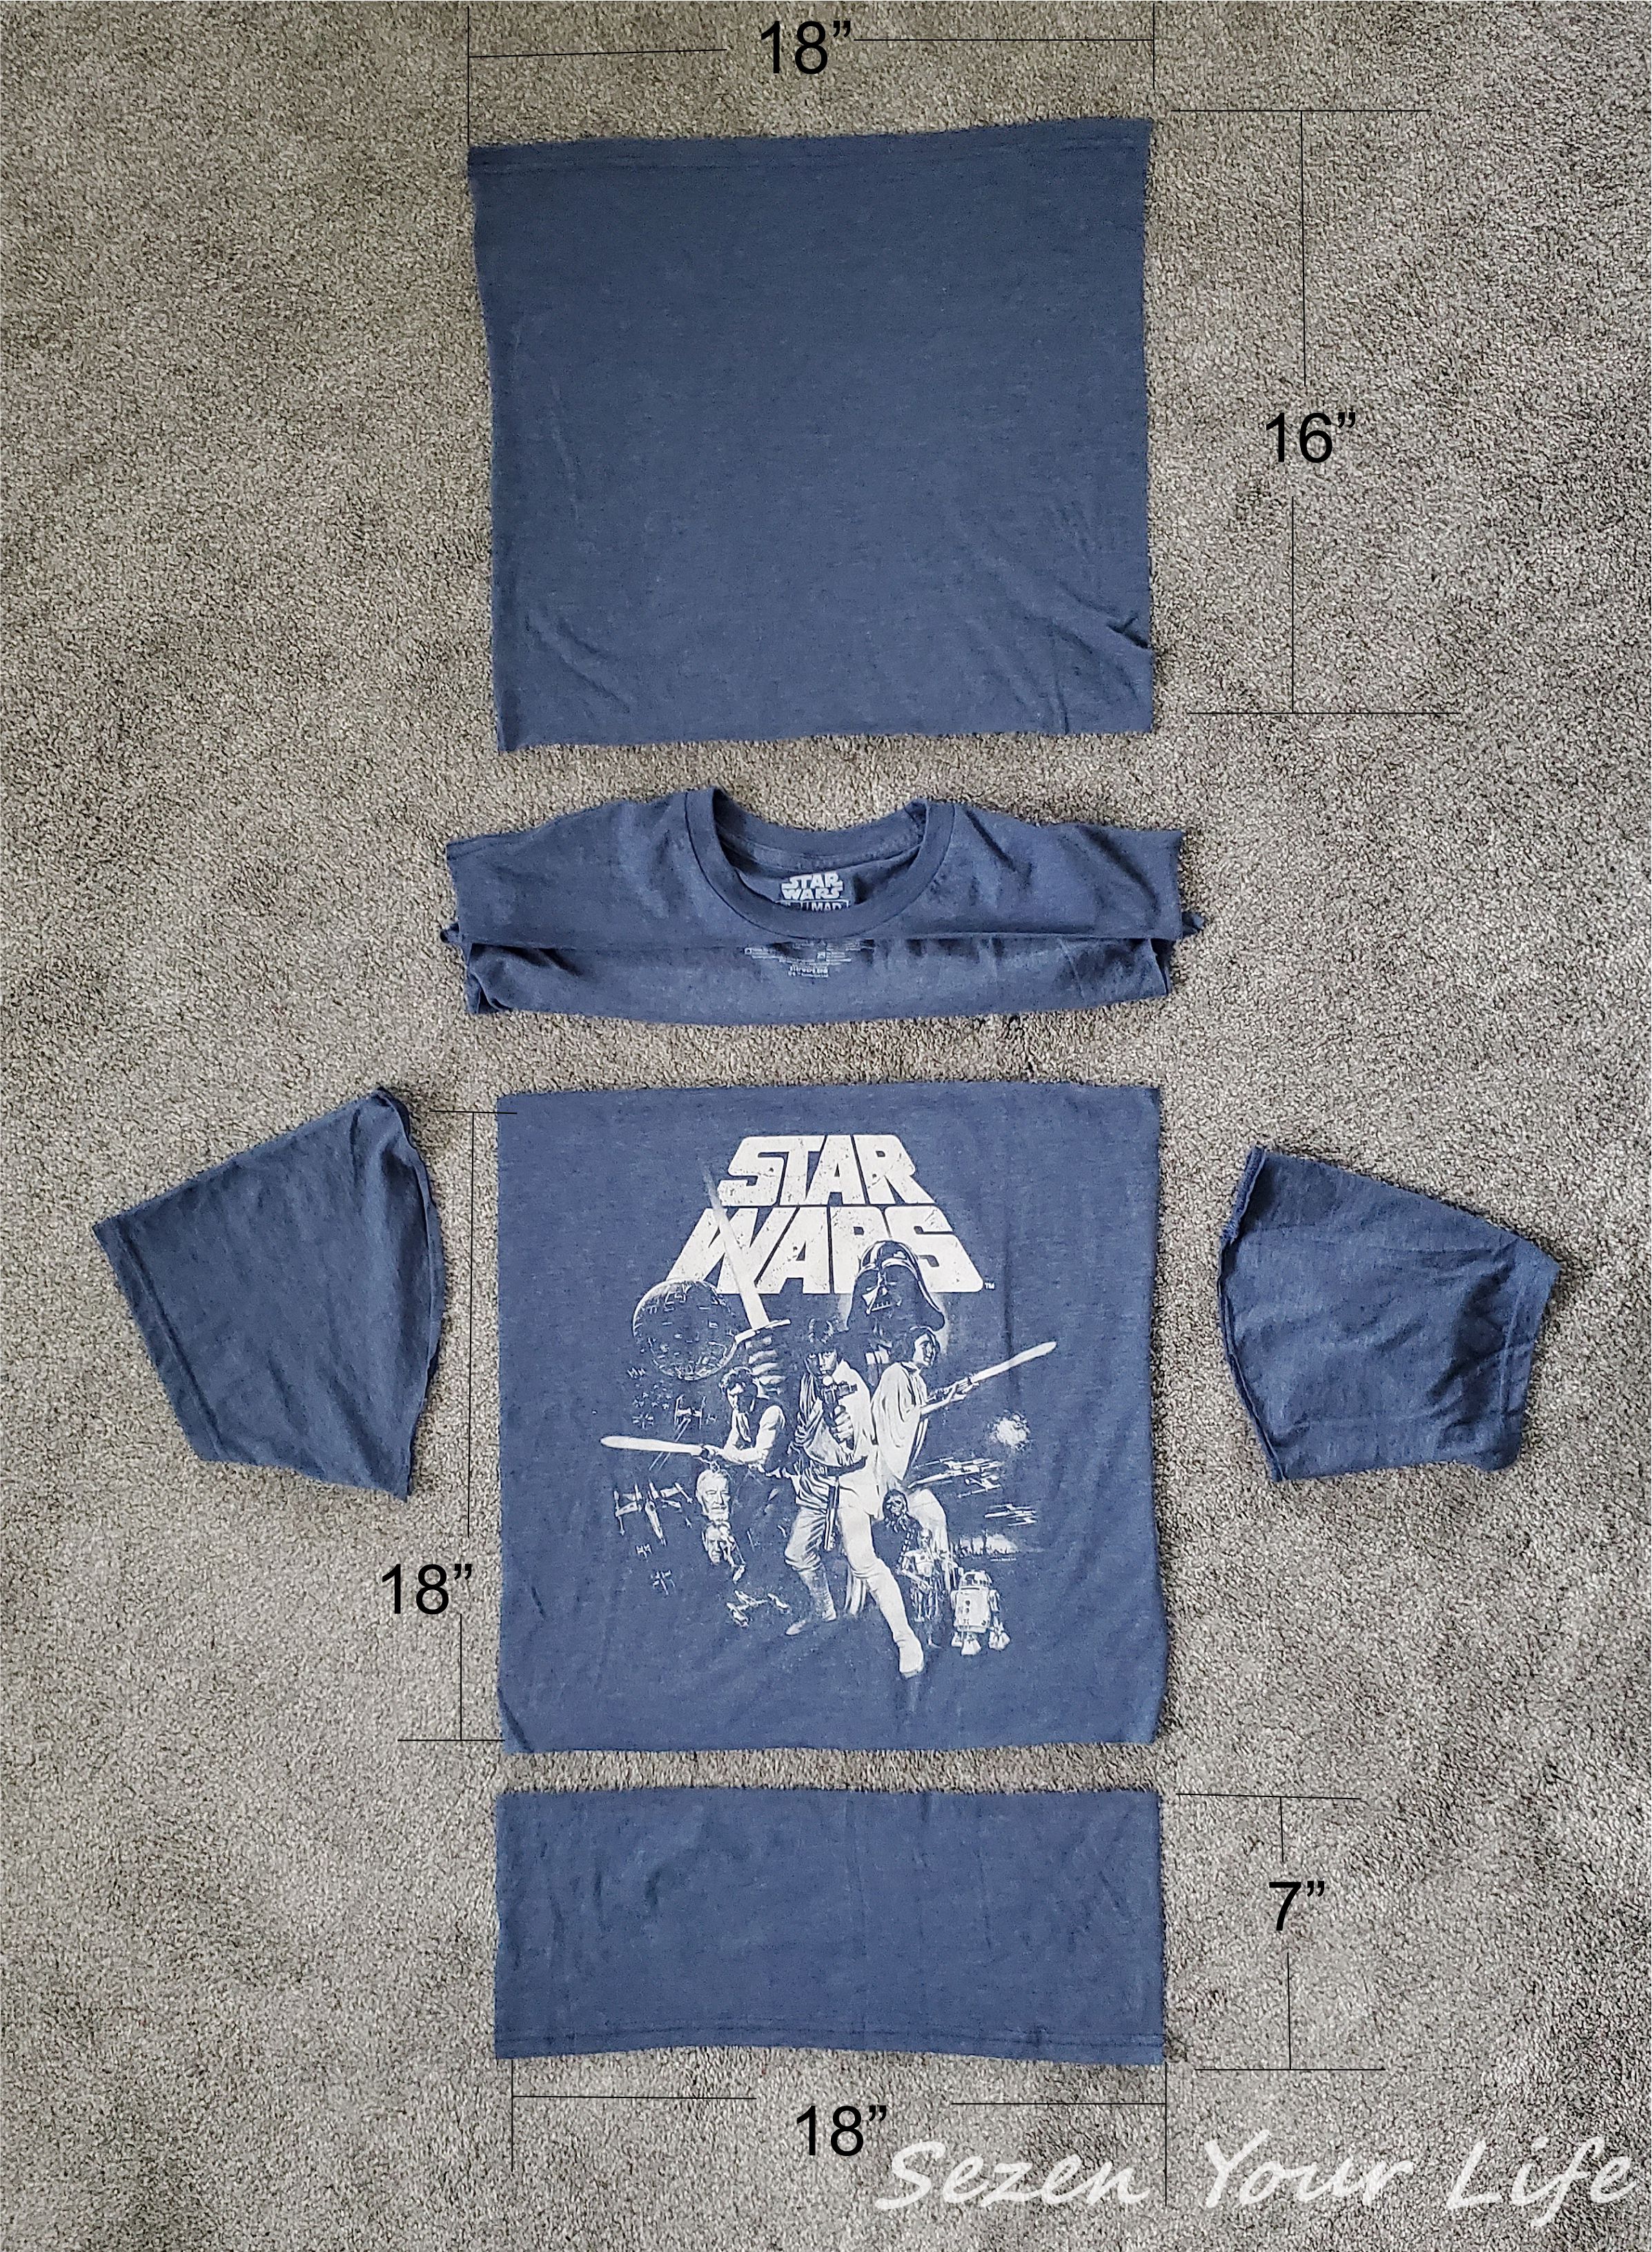
The main panel with the Star Wars image is cut to 18″x18″; the reserved bottom hem from the front of the shirt is the same width of 18″ but only 7″ tall. The back was measured from the hem up and is also 18″ wide, but to allow room to insert the pillow, it’s only 16″ tall. The 2 blank pieces, each with the original hems, will overlap approximately 5″.
I would have preferred to have more height on the smaller panel to ensure a great fit. Ideally 2 back pieces each about 3/4 height of the original size would be perfect. These still look great when finished; but I wouldn’t recommend any less than a 5″ overlap or else you may see the pillow pushing out the back. For this particular shirt the image on the front was very large. If you do have a smaller logo, I’d suggest using smaller pillows and therefore a smaller cover to have more fabric left for the back.

Here the final pieces are laid out ready to be pinned. I cut and squared them all as best you can with a knit fabric that doesn’t have any interfacing or stabilizer.
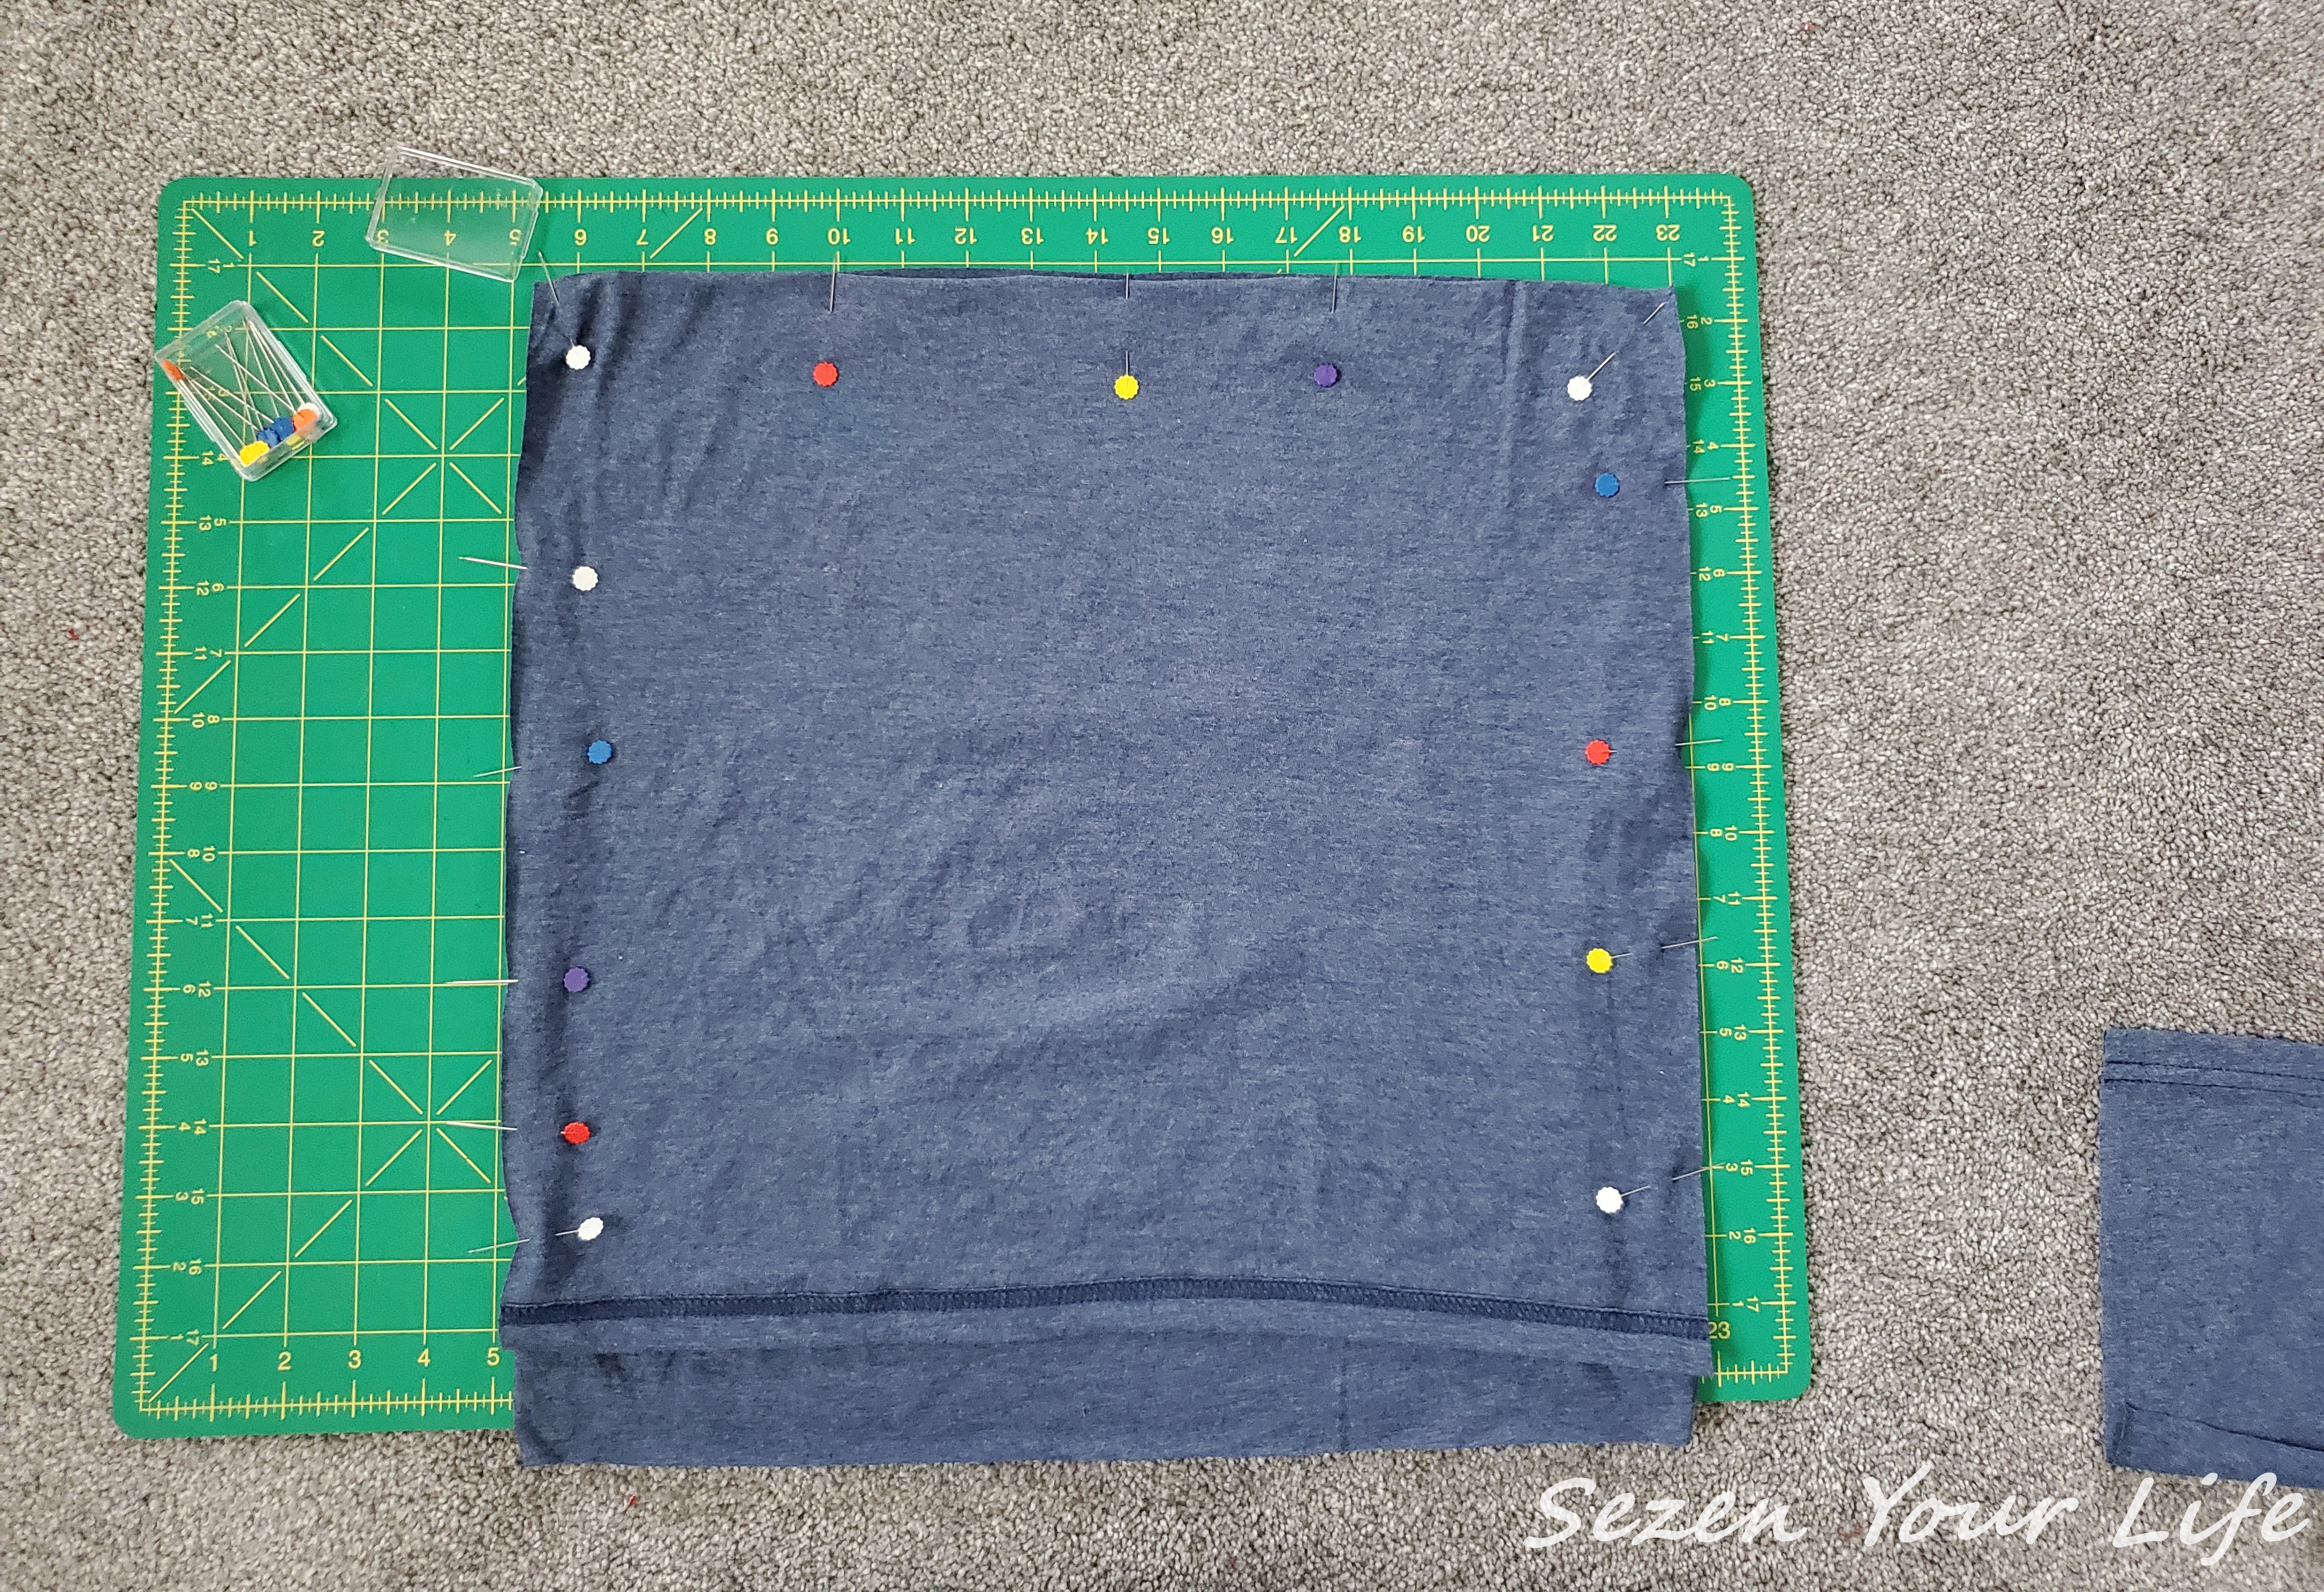
Pin right sides together starting with the larger of the 2 back pieces (or whichever piece you’d like on top once the cover is finished).
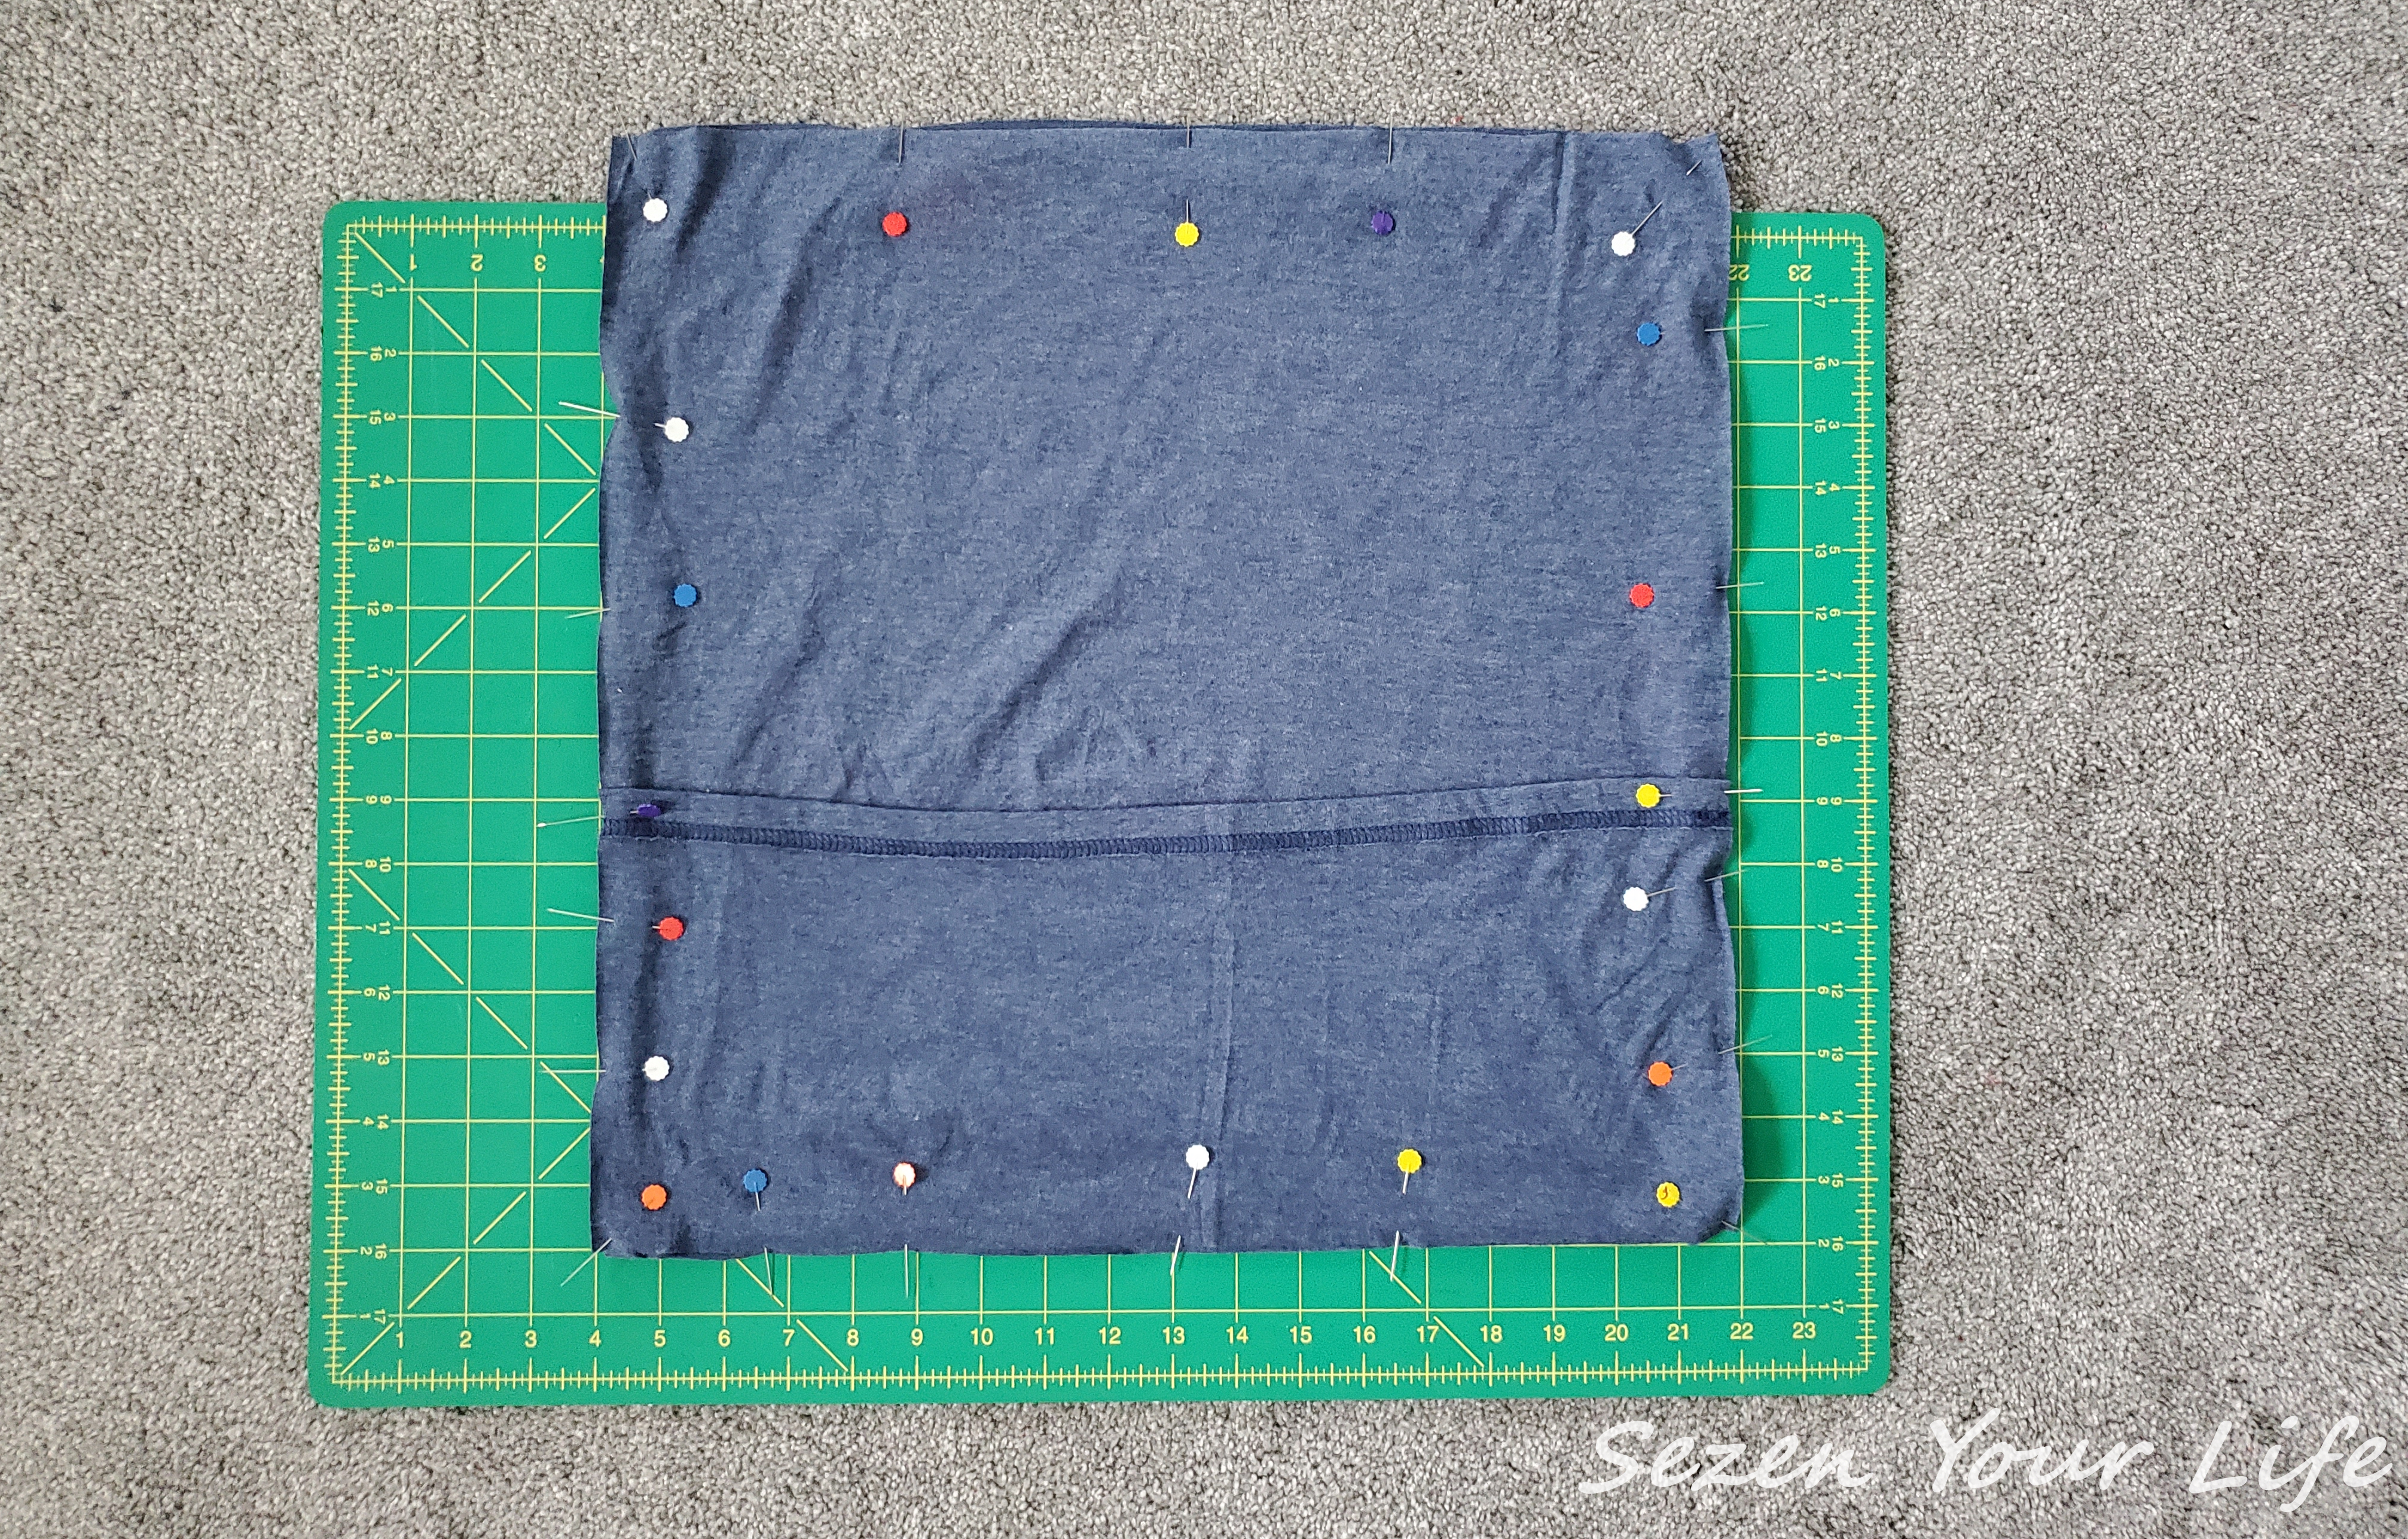
Next pin on the bottom, again right sides together. As you’ll notice the original hems have overlapped and they will serve as the new hems to keep a nice finished edge.

Simply stitch around the perimeter of all 4 sides. I used a zig-zag stitch and a 1/2 inch seam to accommodate for some of the edges that got a little weird when cutting and weren’t perfectly square. This is one of those moments when you realize how forgiving this project can be. I’m used to quilting with 1/4 inch seams and needing everything to line up perfectly. In all honesty I made several mistakes. At one point I didn’t even catch the underside when sewing for several inches which left a large gap. I just went back and restitched that area at the very end, and you can’t even tell.
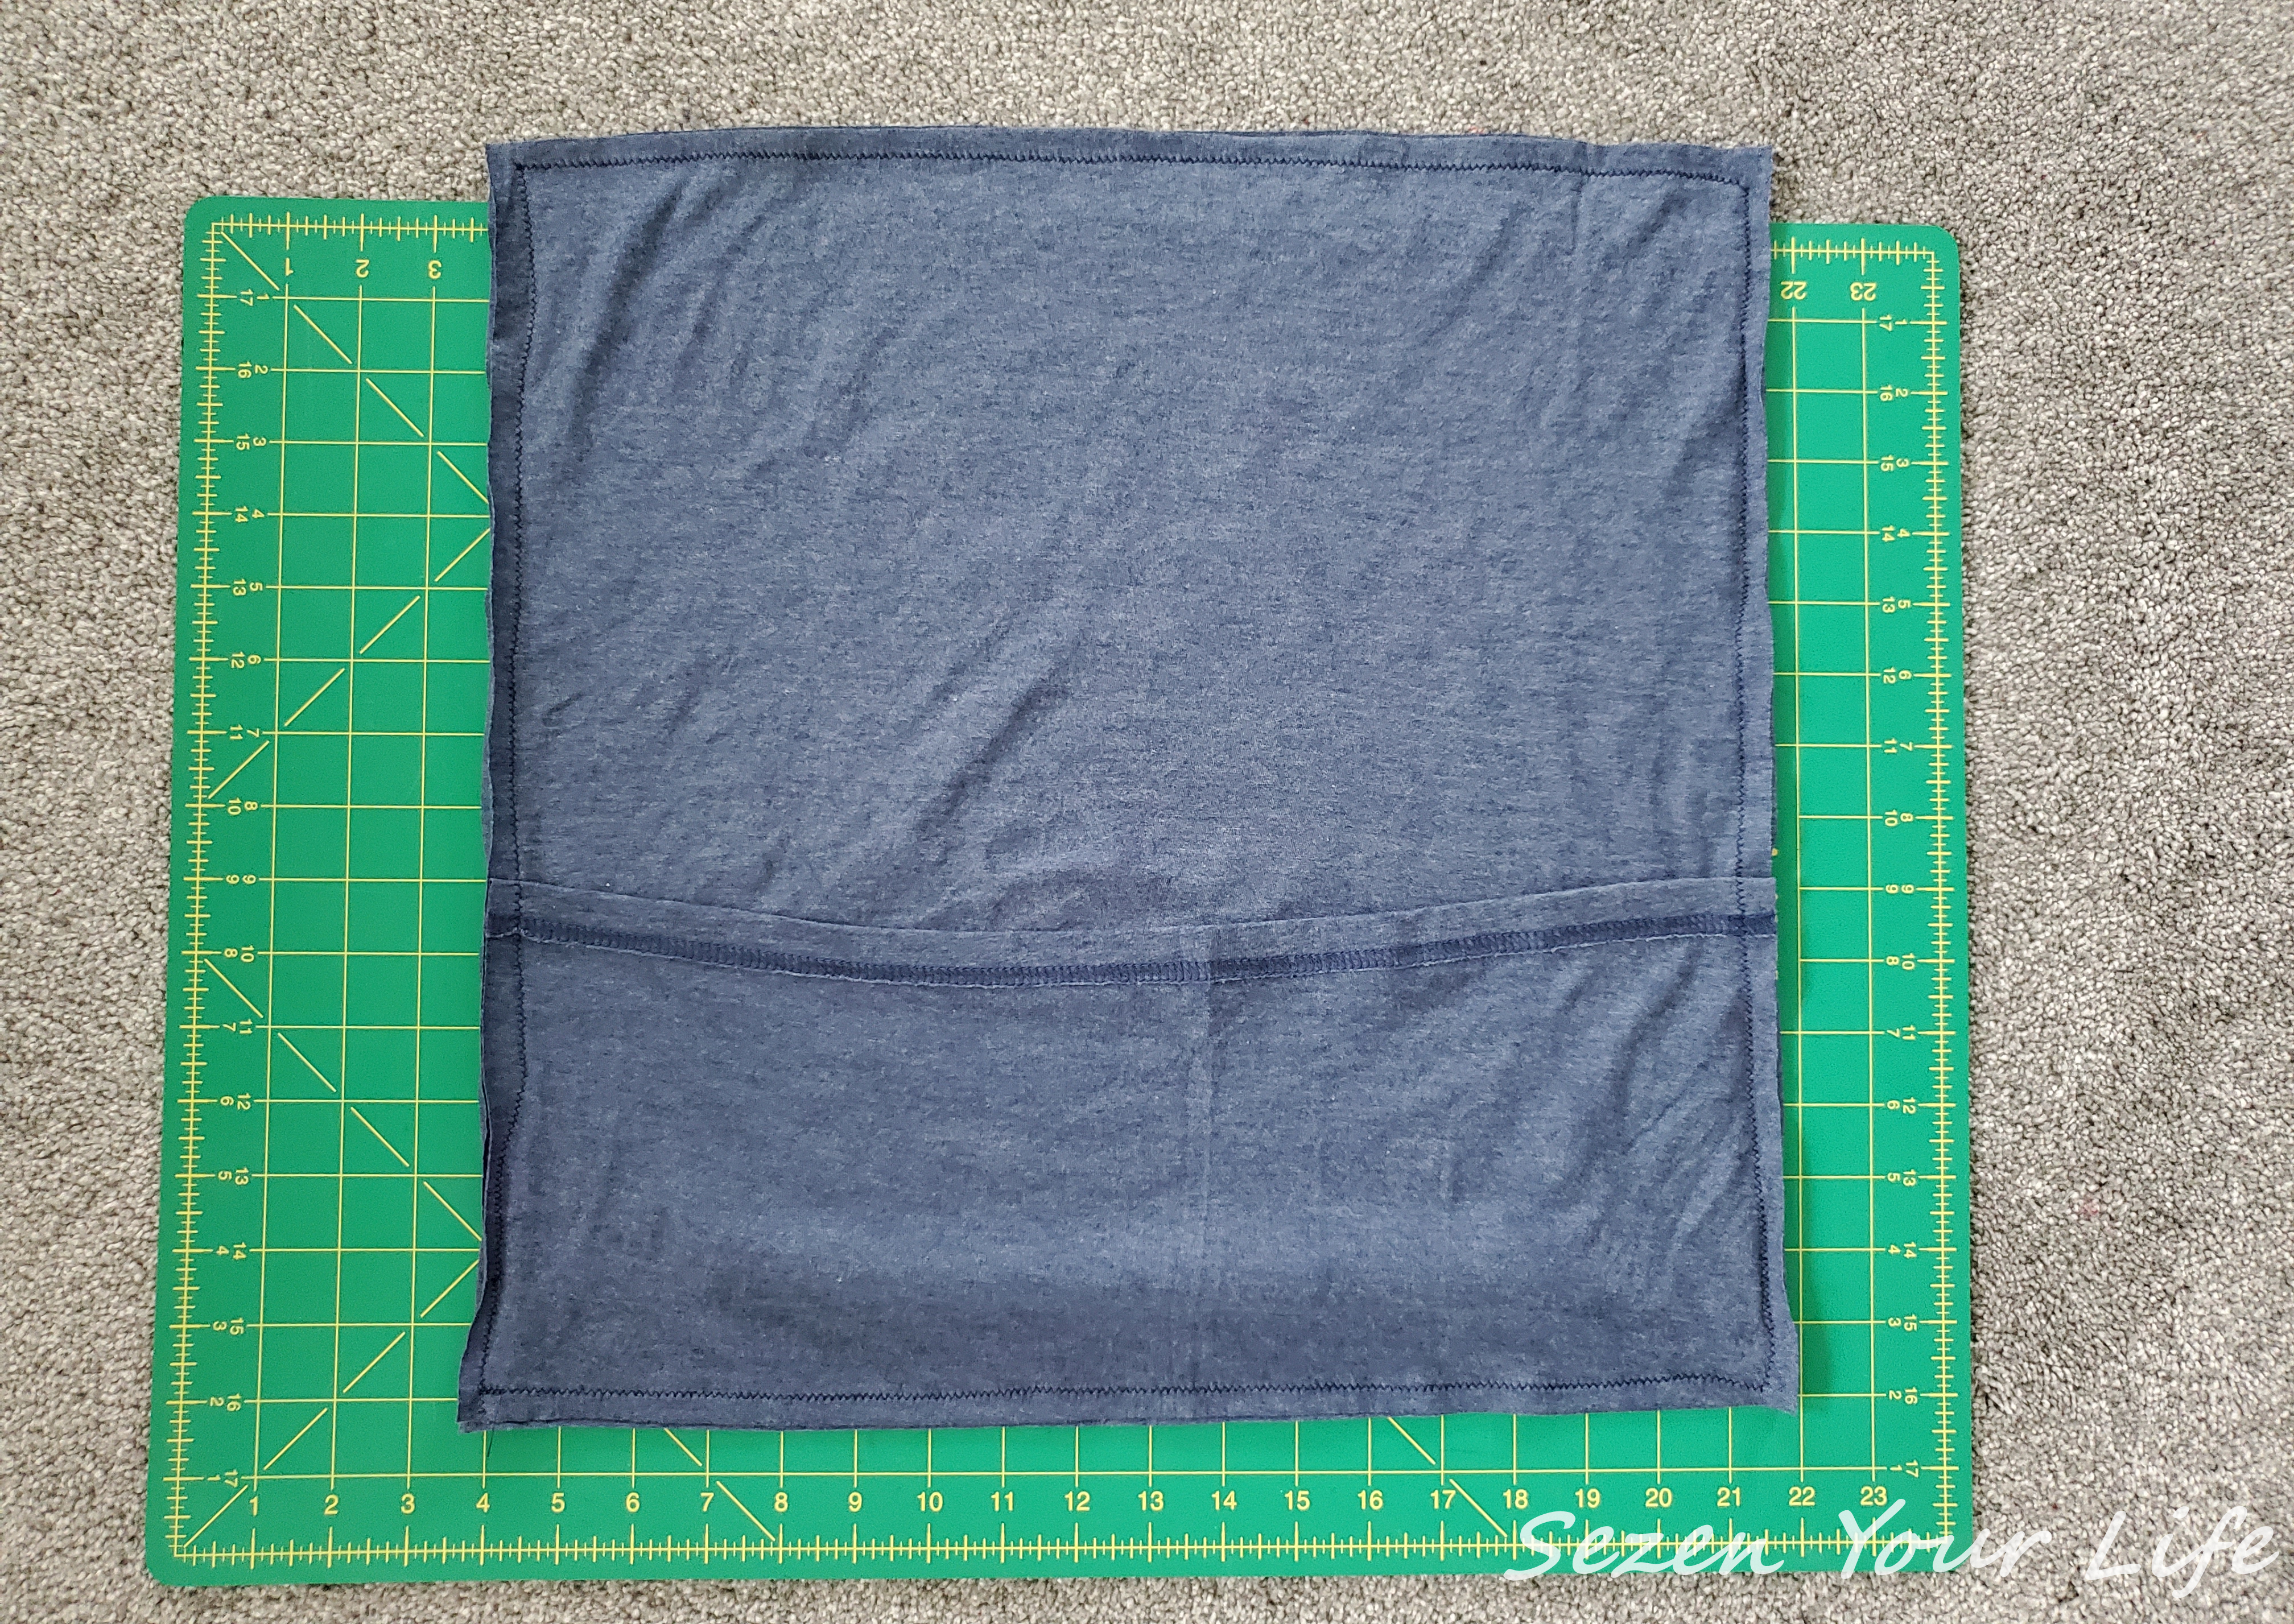
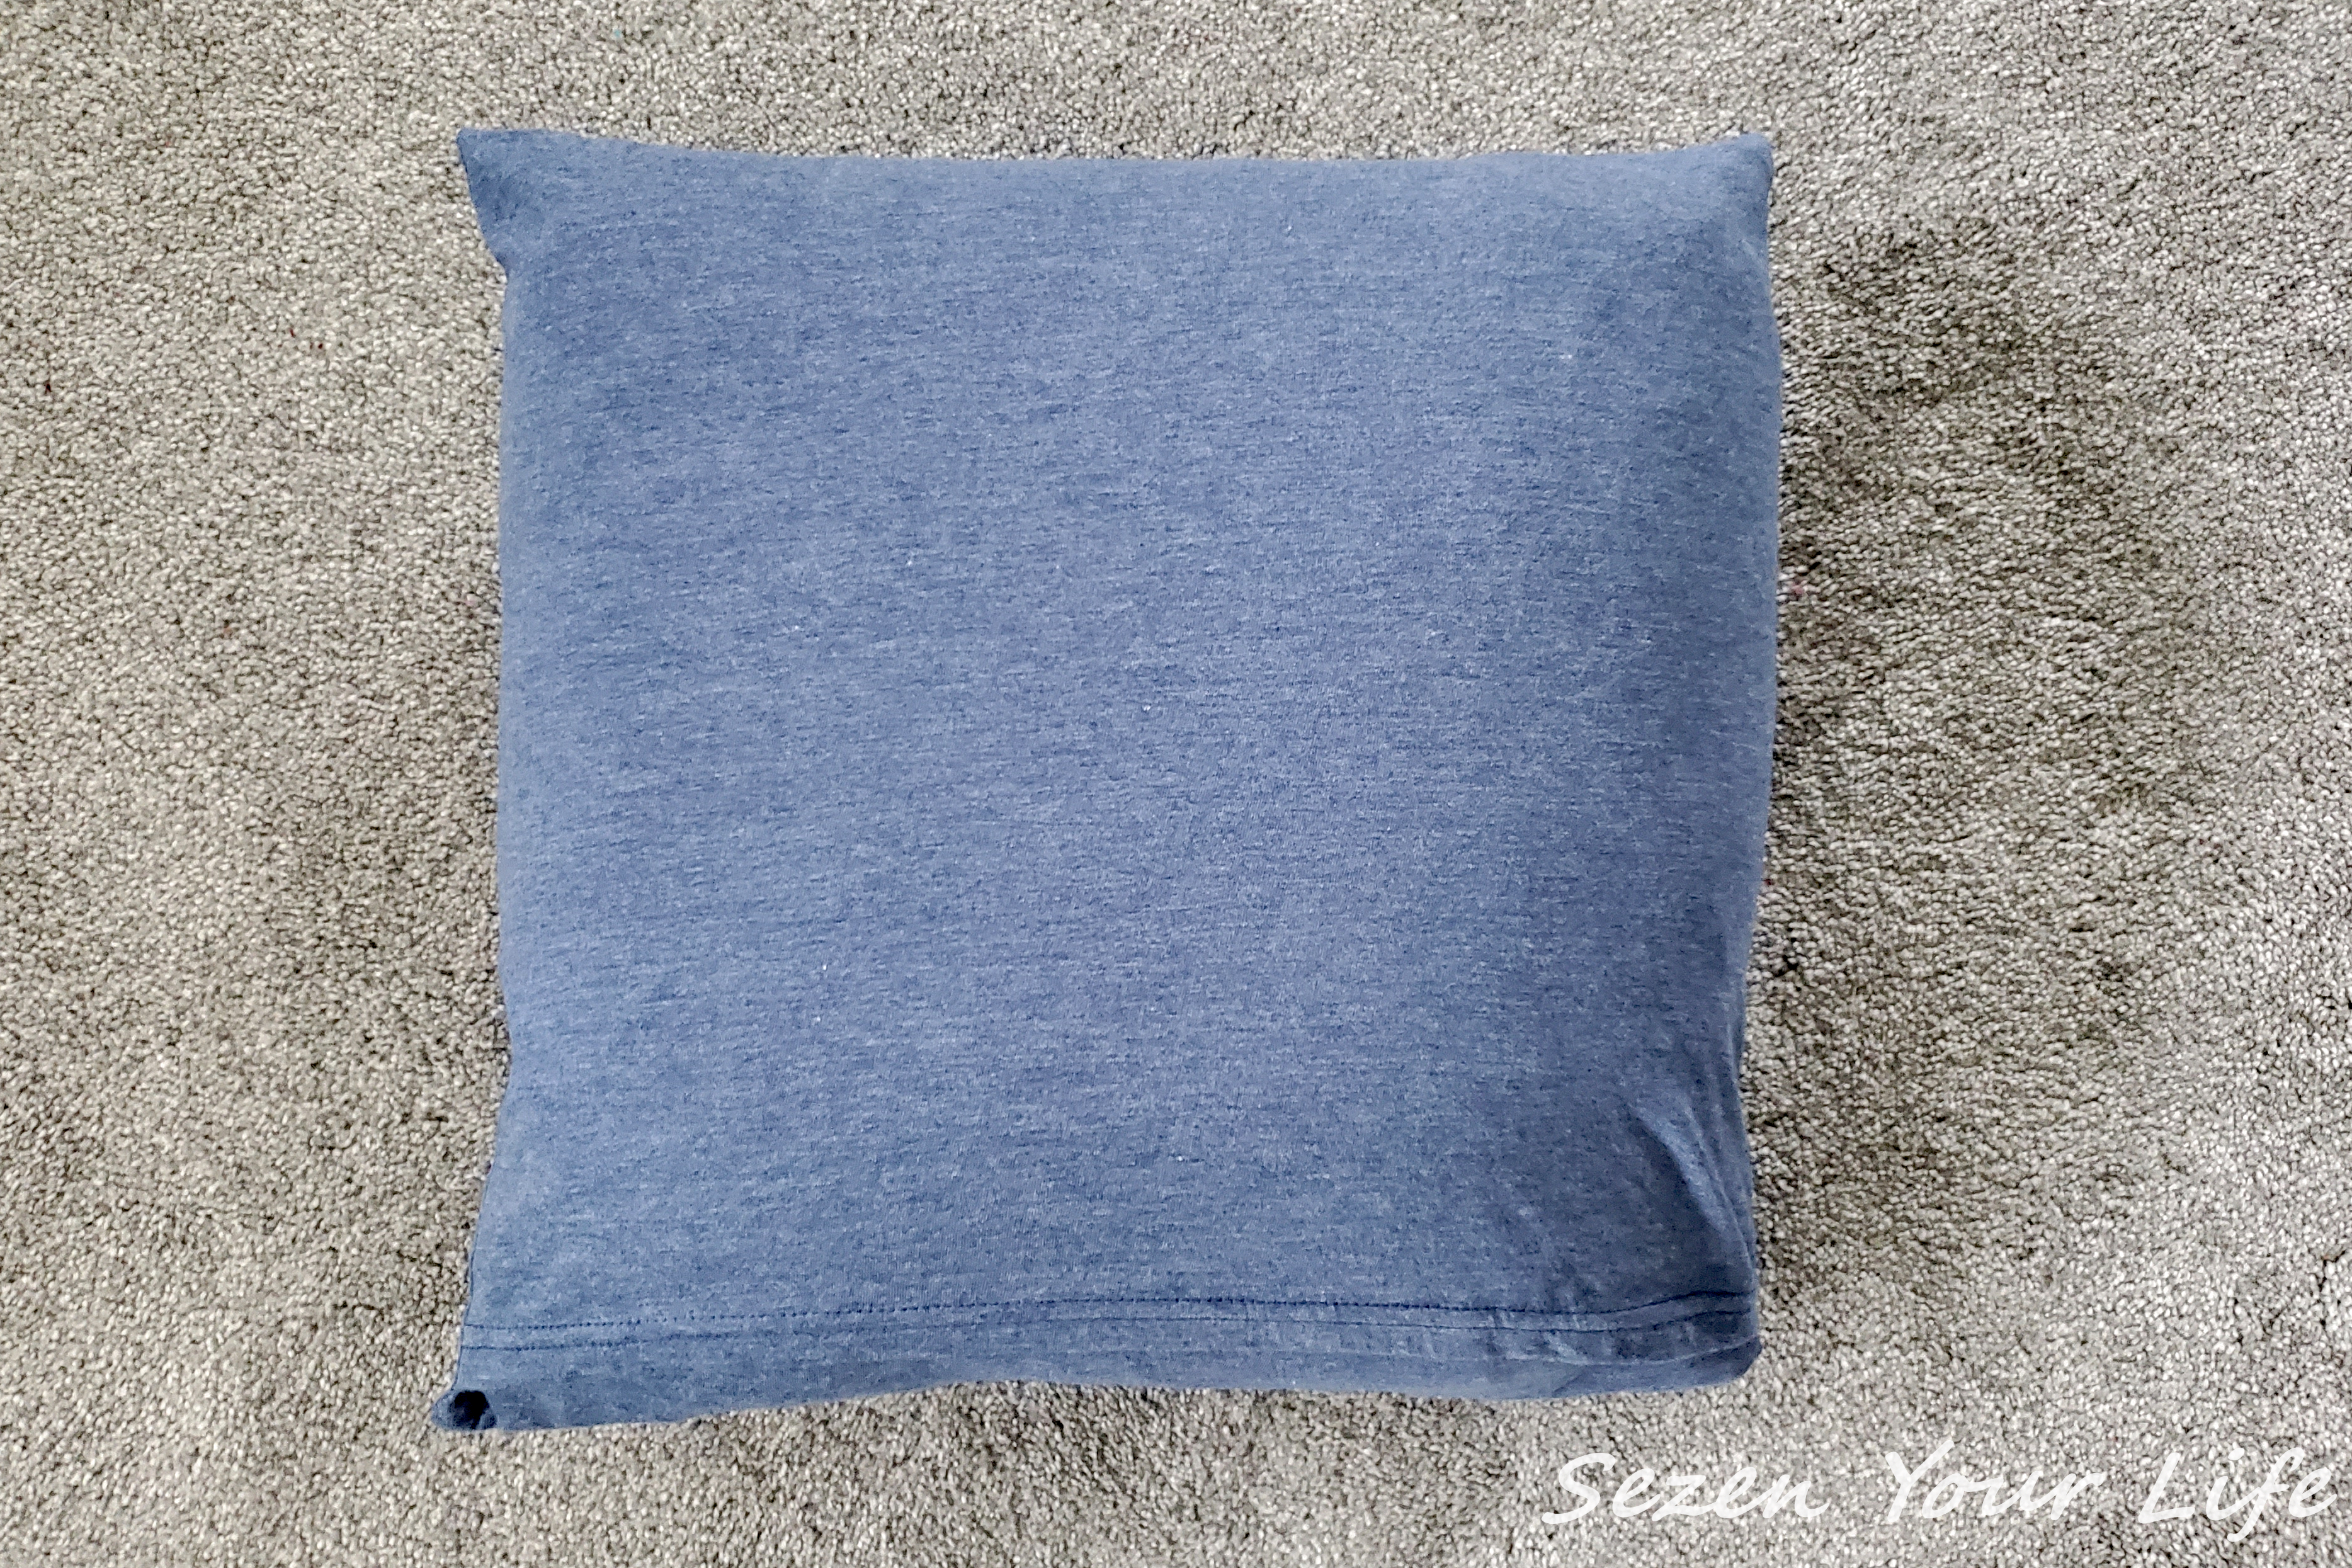
Here is what it looks like fully sewn, inside out…
and flipped right-side out!

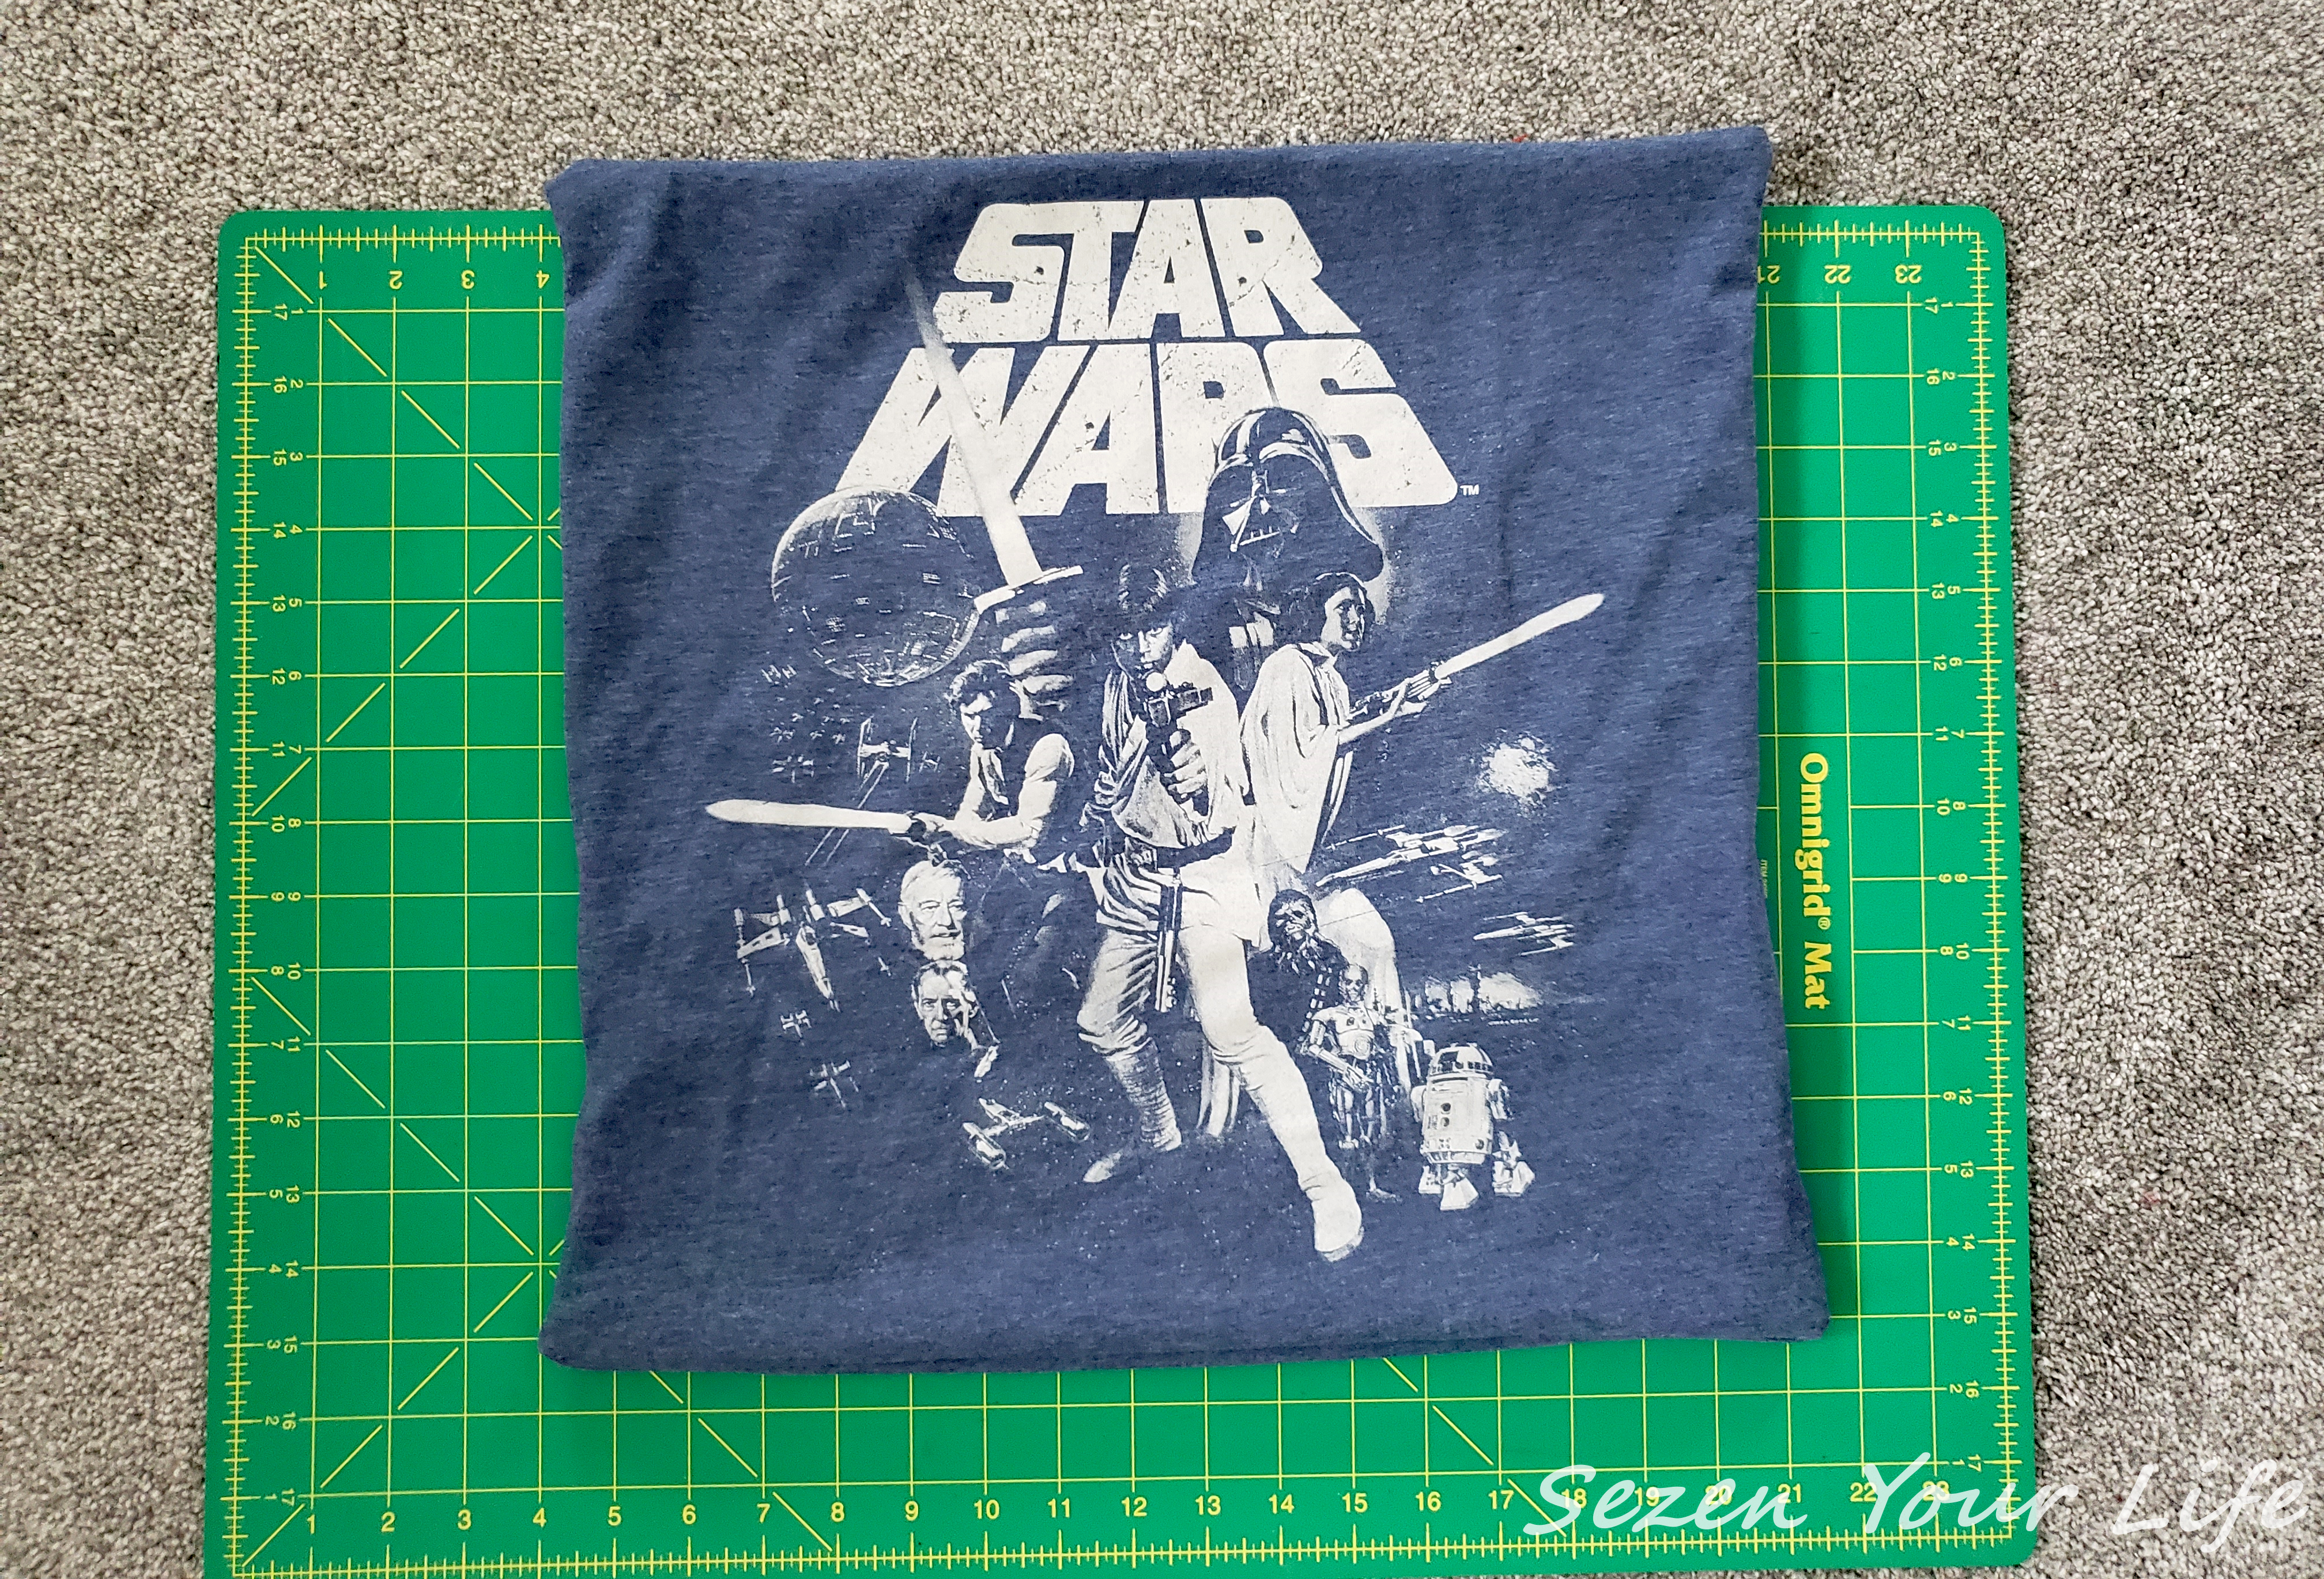
All that’s left to do is stuff in the pillow.
Tuck under the edges to give it a smooth appearance.
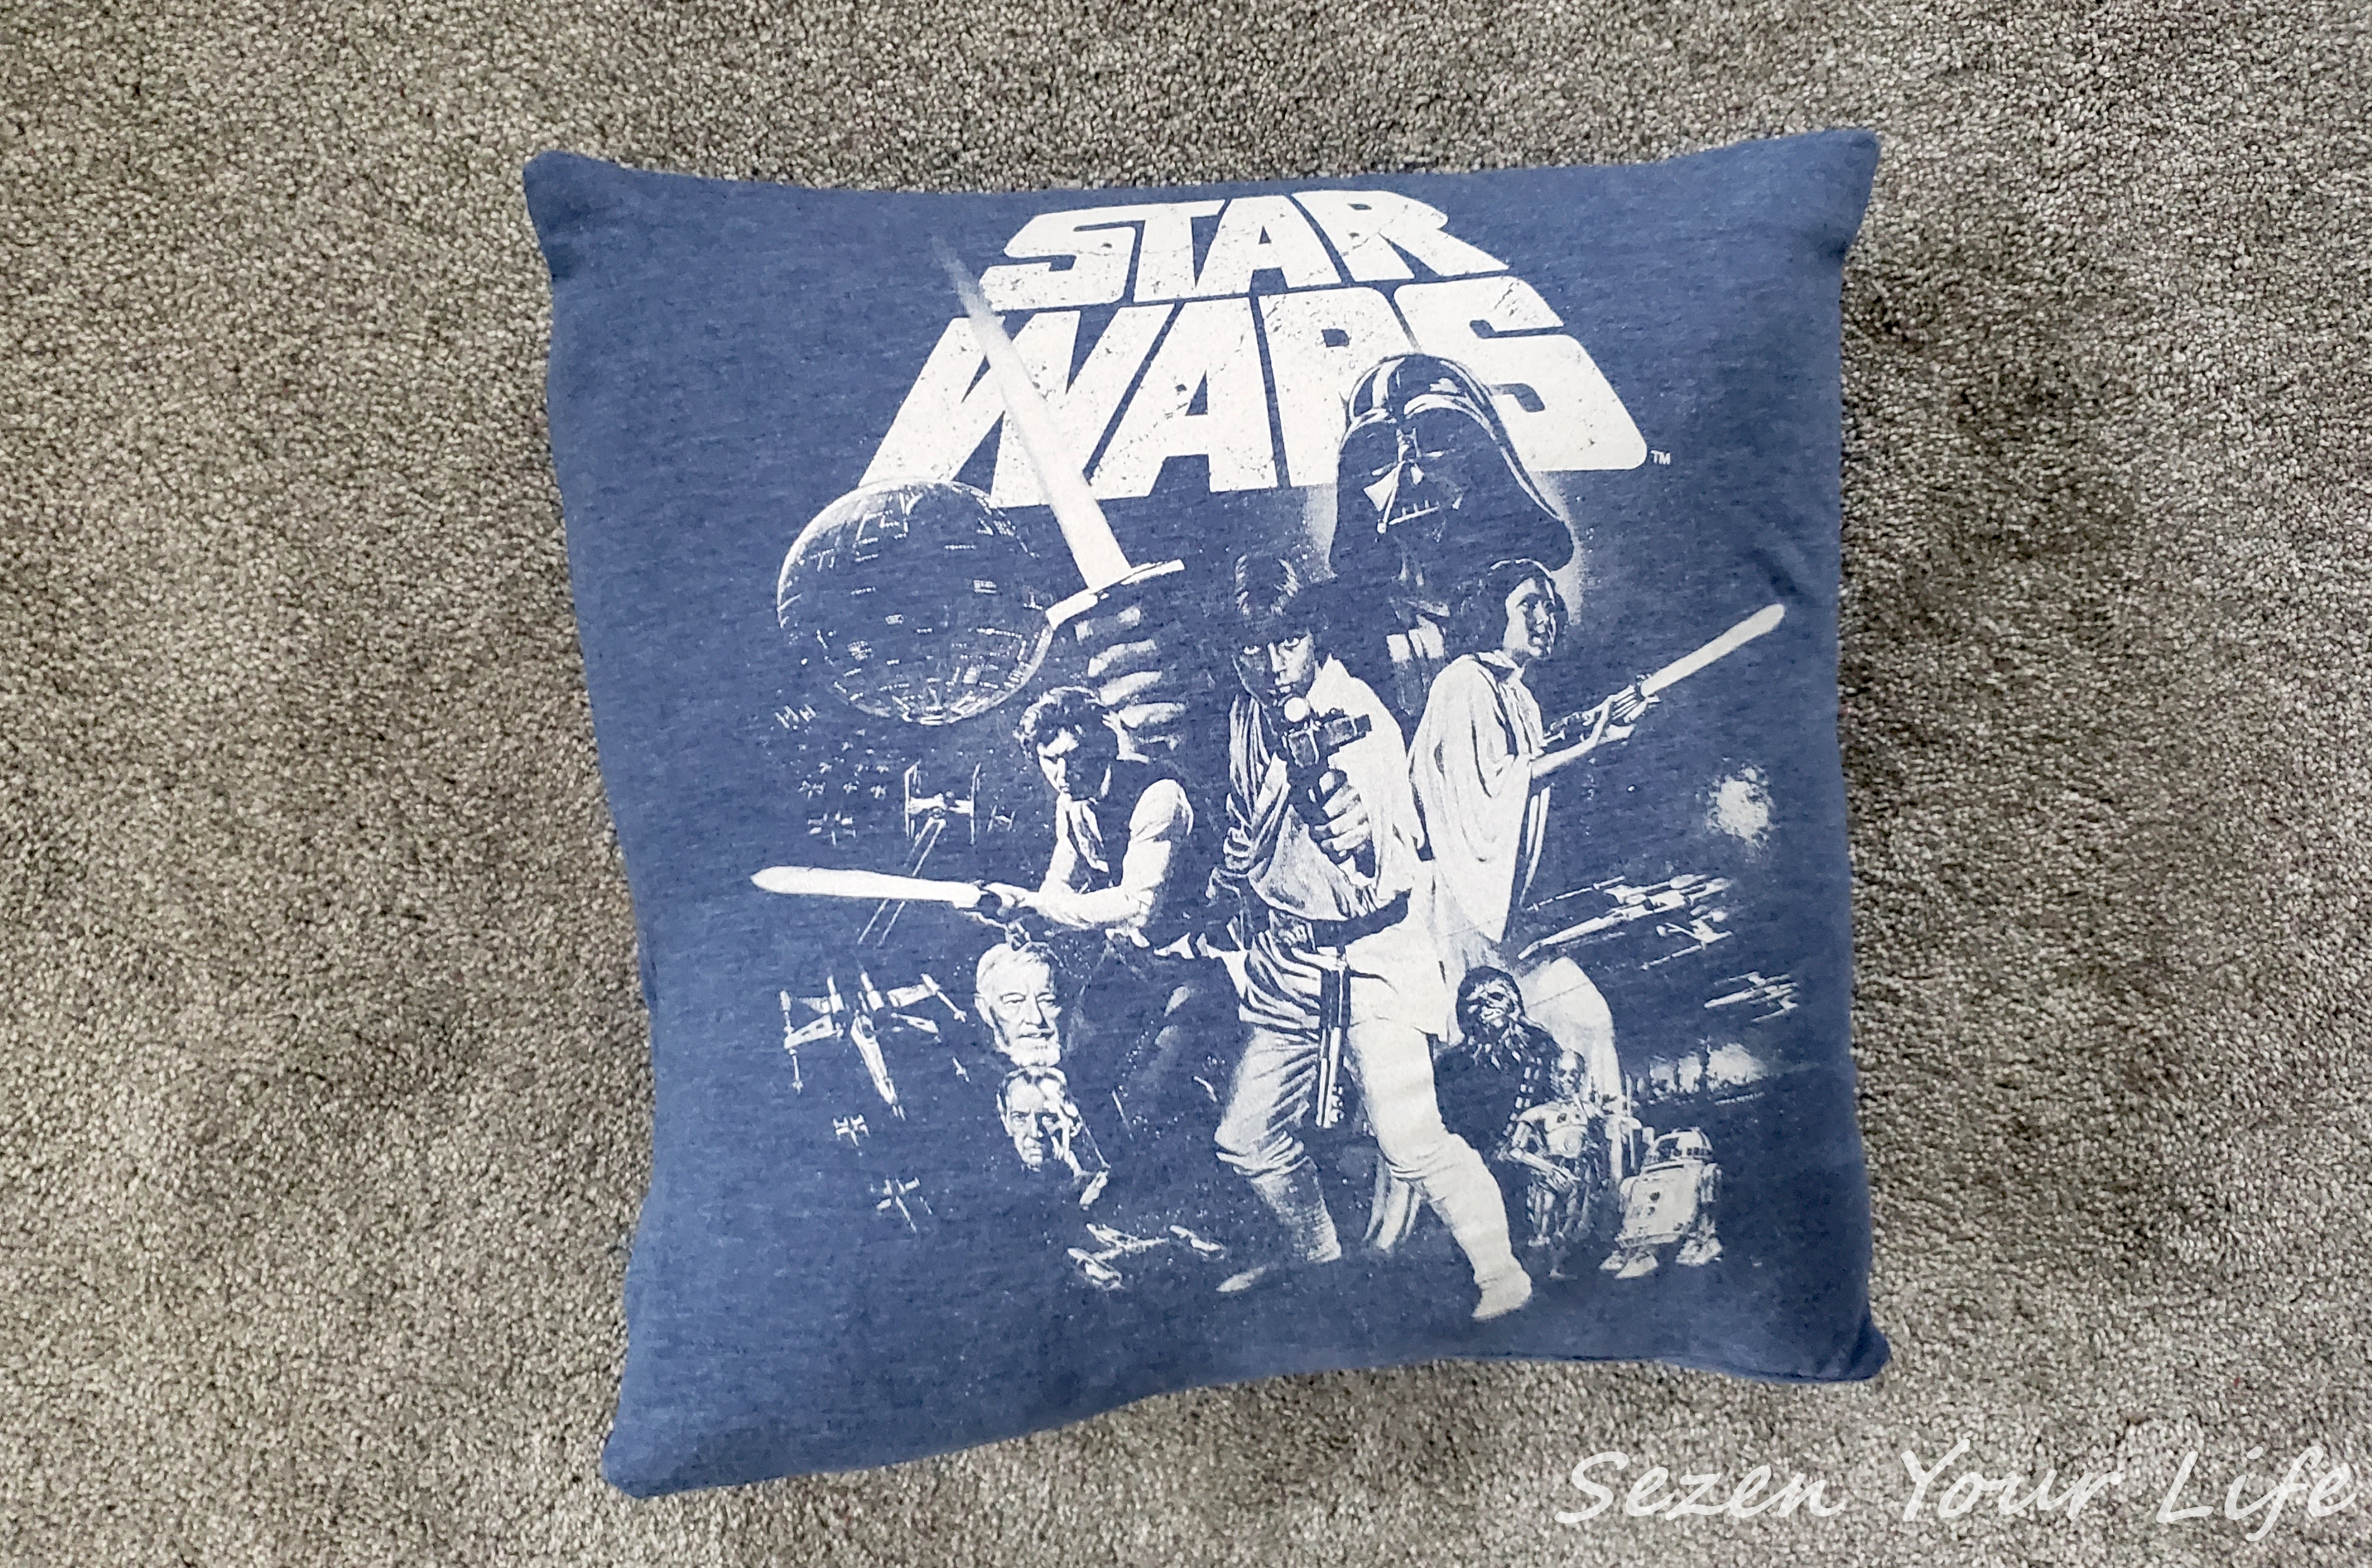
And there you have it; soft, comfy to lay upon, easy to remove and wash, the perfect and personal addition to any room!
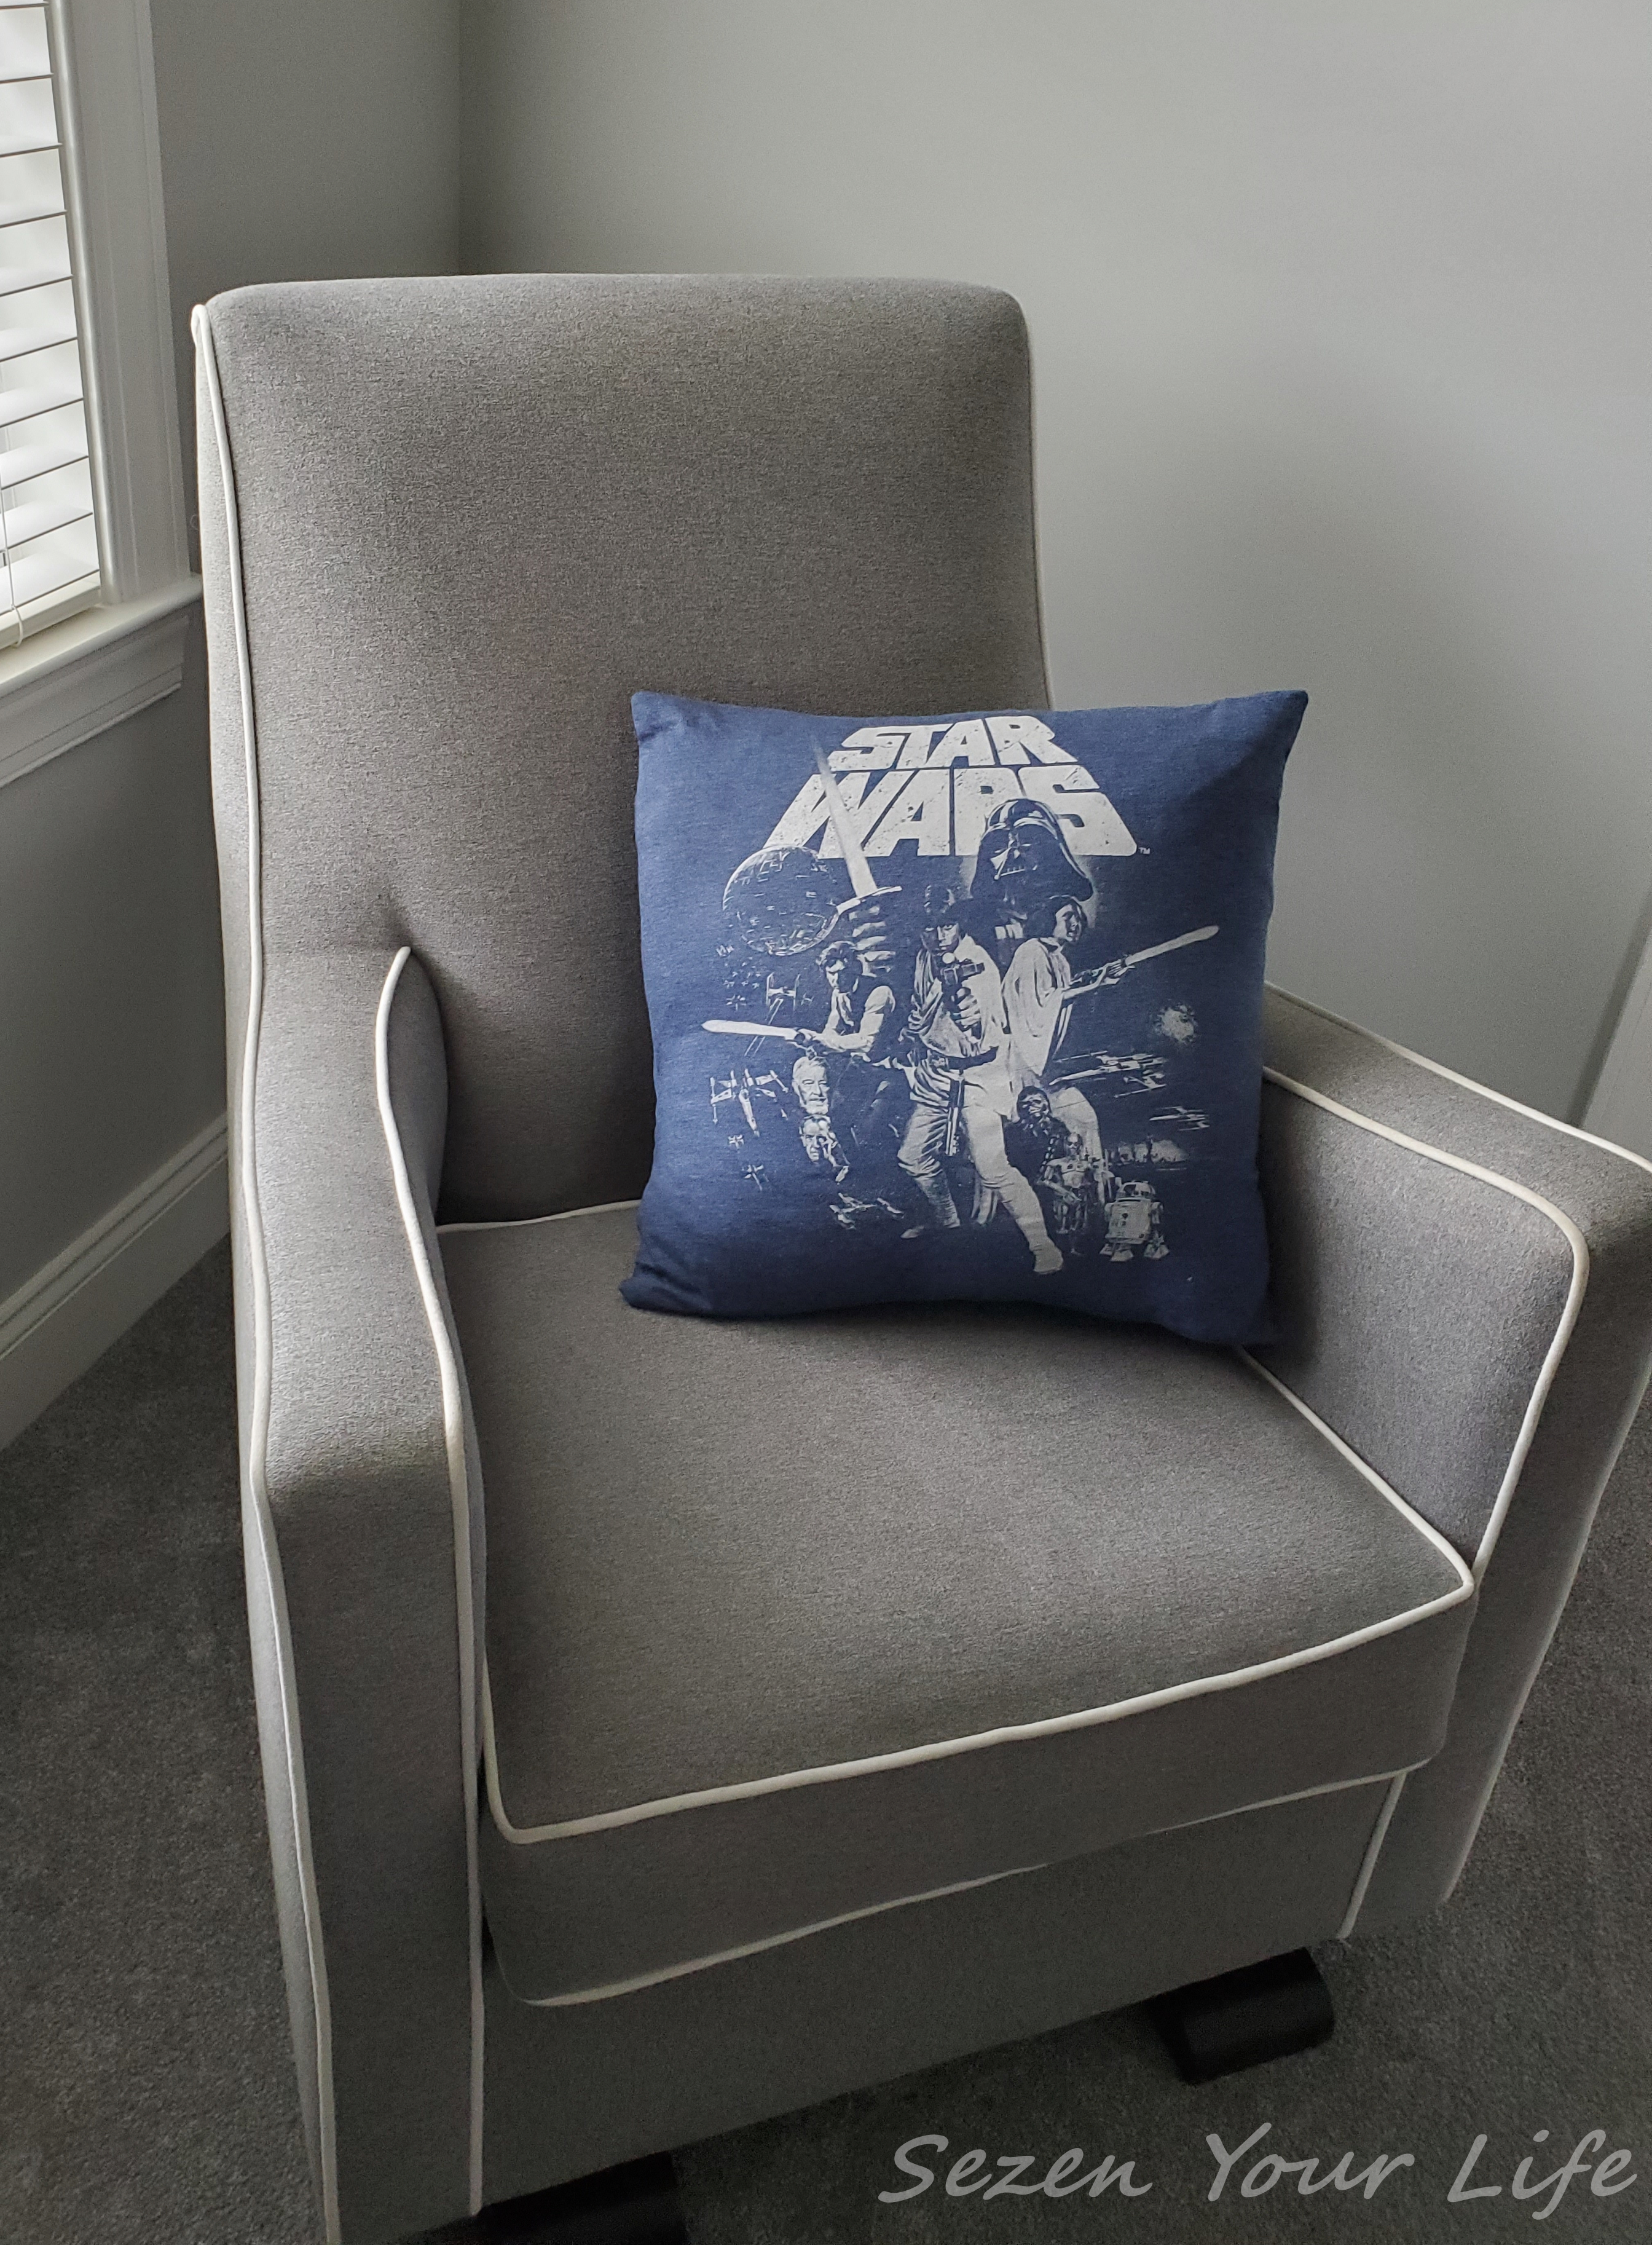

In just an afternoon I completed all 3 pillows. I’m happy with the results and that I have one more project crossed off my list. This is a great quick and simple homemade gift that even your kids could make.
Happy sewing! Let me know if you have any ideas or suggestions or want to share your own creations!
You Might Also Enjoy:

3 comments
2 pings
If I was a sewing guy, this would be my kind of project. I do cook, clean, vacuum, wash clothes, iron, mend. But I cannot sew like this. Do you ever do custom work or know someone you trust who does? If not, I’ll likely get someone to make a quilt from these 16-20 t-shirts from my deceased son. Thanks for your thoughts,
Jim
Author
Dear Jim,
First of all, please forgive my delay in response. But you sound like a true renaissance man, a jack of all trades! You might even surprise yourself with sewing. Maybe this winter you can give it a go with some scrap fabric 🙂
I usually don’t do custom orders, but the website Etsy is a great place to start. There are some amazing artists and crafters there and they have customer reviews. Due to the cherished nature of your items I would suggest searching in your local area to see if anyone happens to be nearby so you don’t have to send shirts through the mail. I hope you can find the perfect solution, having a quilt like that to remember your son is a wonderful idea!
Many blessings for your project!
Sarah
These instructions worked very well. Its very clever how the hems of the shirt are used to make easy finished edges and the opening for the pillows. Thank you!
[…] pour recycler et garder précieusement de beaux t-shirts à motifs. Voici le tuto détaillé de Sezen Your Life pour coudre le tien […]
[…] by Sezenyourlife […]