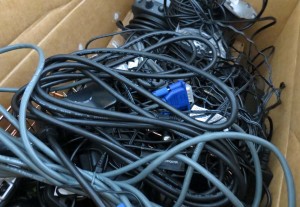
Does this look familiar, boxes and totes full of discarded and outdated electronic devices in a tangled mass of cords? Over the years, we have gone through several computer towers, printers, DVD players, and sets of speakers. Some have been upgraded, others replaced after extensive use.
In our last house, all of these unused items were thrown in the closet. We had the mentality that they might come in handy later for parts, or we might need a backup in a pinch. With technology changing so quickly, it didn’t take long before most of the stash was completely obsolete. After sorting out the junk, we were left with a handful of devices we were keeping on hand, and the rest was a big pile of trash.
We had an exceptional amount of electrical cords in particular. Often new components come with their own cables. Most of these went largely unused in our house because my husband would replace them with better quality products and HDMI cords. We had several bags, and I couldn’t bare the thought of just throwing them away to clog up the landfills. They were good cords and surely something could be done with them.
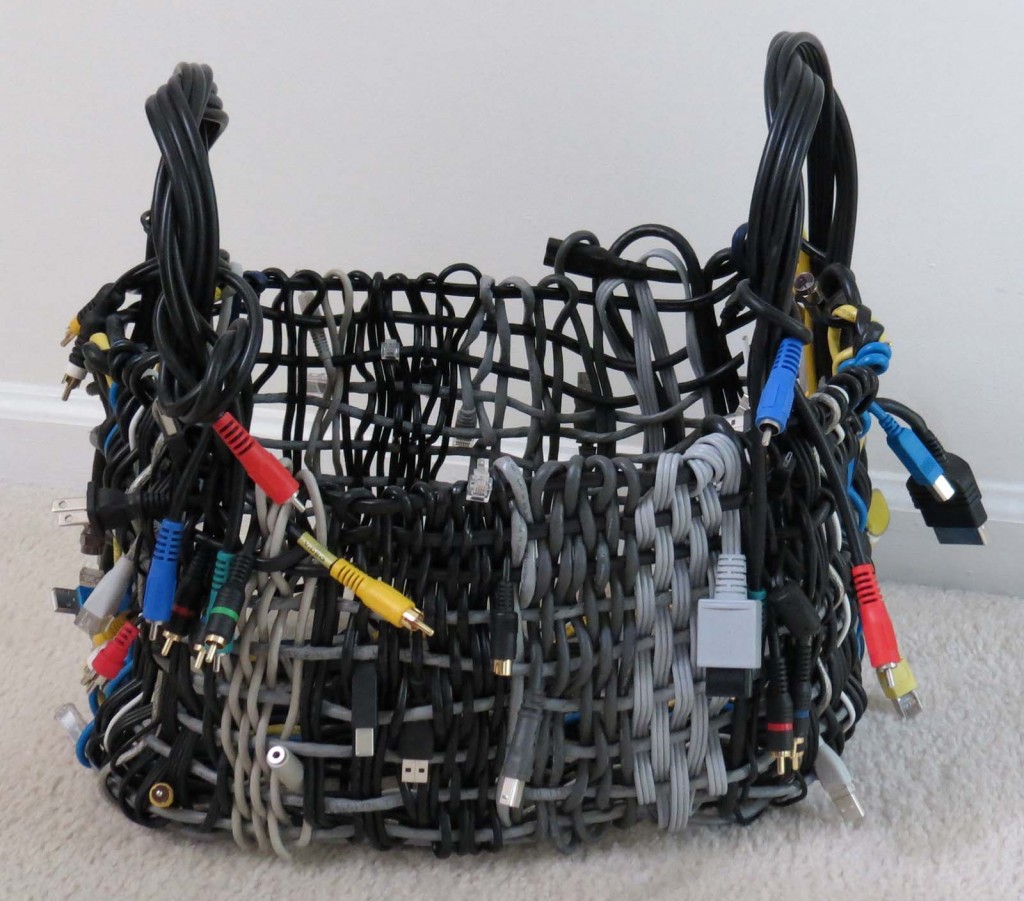
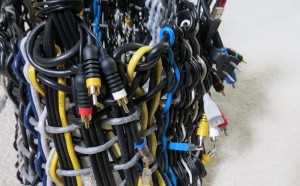
Much to my husband’s surprise, after a full day back in my craft room I emerged with the basic structure of a basket, made entirely from his discarded cords. I actually created this project a while back, before I had this blog. So I’m sorry, but I did not document the steps and take photographs. It was more of an artistic work in progress anyway. Since I’d never done this before and had never heard of anyone else doing it, I was just winging it, hoping for the best.
After a few more hours and several cords later, I had most of the gaps filled in and a sturdy basket for holding magazines.
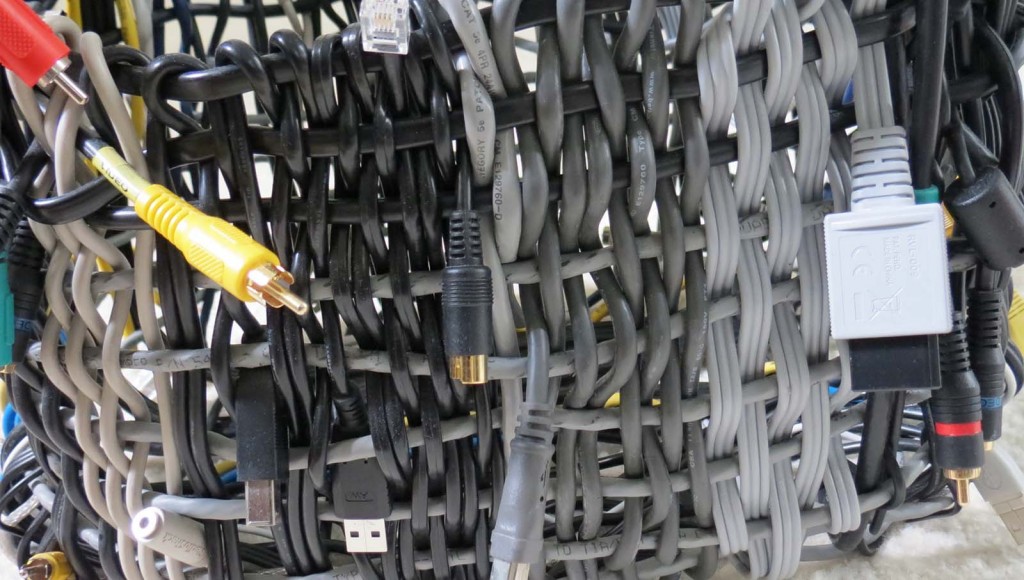
The only thing better than finishing a completely unique hand-made project, is creating it from unlikely materials. I am surprised how well it holds its shape. The cords are a great durable medium and they could easily be employed for outdoor projects too. Most of the ones incorporated in this basket are pretty substantial, making it relatively heavy. If you are thinking about weaving cords for clothing and accessories, definitely stick with the smaller ones (phone chargers, for example).
This basket took hundreds of cords. One option for a similar look that would require less time and fewer pieces is to use a pre-made wire frame for a support structure and weave the cords around that. This time of year you can find great deals in the garden section for hanging baskets. They are the perfect base for creating one-of-a-kind bowls, vases, and even lamp shades.
What’s your favorite upcycled project? Do you have random materials or objects lying around that you don’t want to throw away but aren’t sure what to do with them? I’d love to hear your ideas and see your creations.
You Might Also Like:
- Decorative Noise Reduction Panels You Can Make at Home
- Magnificent Magnet Board
- More Than Just a Mere Magnet
- Repurposing Old Bed Sheets into a New Comforter
- Unleash Your Creativity


10 comments
Skip to comment form
Wow! I’m impressed by your ability to see beyond the normal uses for those cords!
Author
Thanks, it was actually a lot of fun. Now the husband has a “non-girlie” basket for his tech magazines and controllers; everyone’s happy!
I’m glad you posted this! It’s such an interesting way to repurpose old cords.
Author
Thanks so much, Lisa! It’s been one of my favorite projects 🙂
Interesting. It might weigh less if the plugs were clipped off, but I guess that’s what makes it unique. I was doing a search for ways to repurpose electrical cording because: I work with church quilters, and we used old sheets and blankets for the middle/batt. Including old electric blankets, which need to have the cords stripped out…yielding what seems like a mile of cord. I was thinking: crochet over it and fashion a coiled basket. Might work. Also, I have access to some grape vines, and those are usable for making a sort of primitive ‘Moses’ basket. I have heard that some places will ‘E-Cycle’ the cords, but I haven’t really checked that out. My own insane weaving is to weave things with the stuff that used to be woven into lawn furniture. It comes in a bunch of colors, and I just like the satisfaction of playing with it. Clothespins help to hold things in place ’til I am done with it.
Author
Thank you for the comment, Dee Jay. What a great idea for your church quilters to use old blankets and sheets for filler! I’ll have to remember that myself. Yes, the basket is quite heavy and removing the plugs and connectors would certainly lighten it up a lot. But as you mentioned, it’s part of the appeal for this particular one since I was making it for my husband who loves the tech side of things. E-cycling is always a great option too for extra cords if they are not put to use, much better than just discarding them in the trash. I love your idea of weaving with remnants from lawn furniture, how creative! I’d love to see some if you have any pictures. And feel free to share any other great ideas you may come up with for uses of the cords or send over pictures if you make your own baskets. Crocheting over the cords sounds like it could yield some really amazing results. Thanks again for taking the time to share your thoughts. Hope to hear from you again soon!
Hi Sarah, I am currently trying to craft a trench coat out of old recycled cords. Would you be willing to advise me on this? Your basket is the only project of the sort I’ve been able to find. Please email me at ideafactori@gmail.com if you are willing. Thanks very much!
Cody
Author
Hi Cody, I’ll be happy to offer any advice I can. I’ll send you an email and we can be in touch. I’m excited to hear about your idea!
Hi Sarah, I’m looking to upcycle as well! Do you have and process photos or tips on how to start? I have my cords and am looking to make a basket. I have made one with found rope so far and am looking to expand.
Author
Hi Emily, I think you’ll enjoy it. It’s such a fun project. I love anything that combines reusing discarded items and then creating a functional, one-of-a-kind piece.
I really wish I would have taken pictures along the way. It went rather quickly though and I made it prior to having this blog. I simply started with my longest cords which were also the closest in length and wove a rectangular section in the middle of them to form the bottom of the basket. (After seeing a diagram in a book or watching a quick YouTube video to see it illustrated I’m sure you’ll catch right on.)
From there I brought the ends up 90 degrees and started weaving cords all the way around to create the vertical sides. I did place a cardboard box inside for a guide and structure. That helped a lot to keep things taught and looking more like a rectangle.
The trickiest part about the wires is that they vary in size, shape, and rigidity. For example coaxial cable (what you’d use to hook your TV up to a cable jack in the wall) is really hard to manipulate. I couldn’t even use them for this project. But on the other hand, Ethernet cable was fantastic. It just took trial and error. I chose to leave the ends on my wires since it was for my husband’s office and he’s big into technology; he liked the look of it. But that made the basket extremely heavy.
The only tools I used were pliers to help pull the wires through, especially as it gets to the end of a cord, it’s hard to hold on to it. And I wore work gloves to protect my hands from the sharp ends. Other that that, it was kind of a mix of weaving and sculpting as I really just played with the cords and let them move and bend as naturally as possible.
I hope this sheds some light on the process. If I ever make another one I’ll try to make a video to document the steps. Best of luck on your endeavors and feel free to share any ideas or tips you discover along the way!
Thanks so much!
Sarah