
There is only one week left till my due date, and our little bundle of joy could arrive any day now. Most of the major things have been crossed off our to-do list; so to help pass the hours I turned my efforts to a fun project for the nursery, a crafty handmade mobile.
I love the stories and illustrations of Beatrix Potter and have incorporated a few of those items to decorate the nursery. Several months ago, I came across some small cardboard cutouts of her characters on sale; they were leftover Easter decorations. Lightweight and only a few dollars, they were perfect for a mobile.
There are so many ways to use the following materials, even if you are not in the market for baby decorations many of these can be applied to create holiday wreaths and other suspended items like wind chimes.
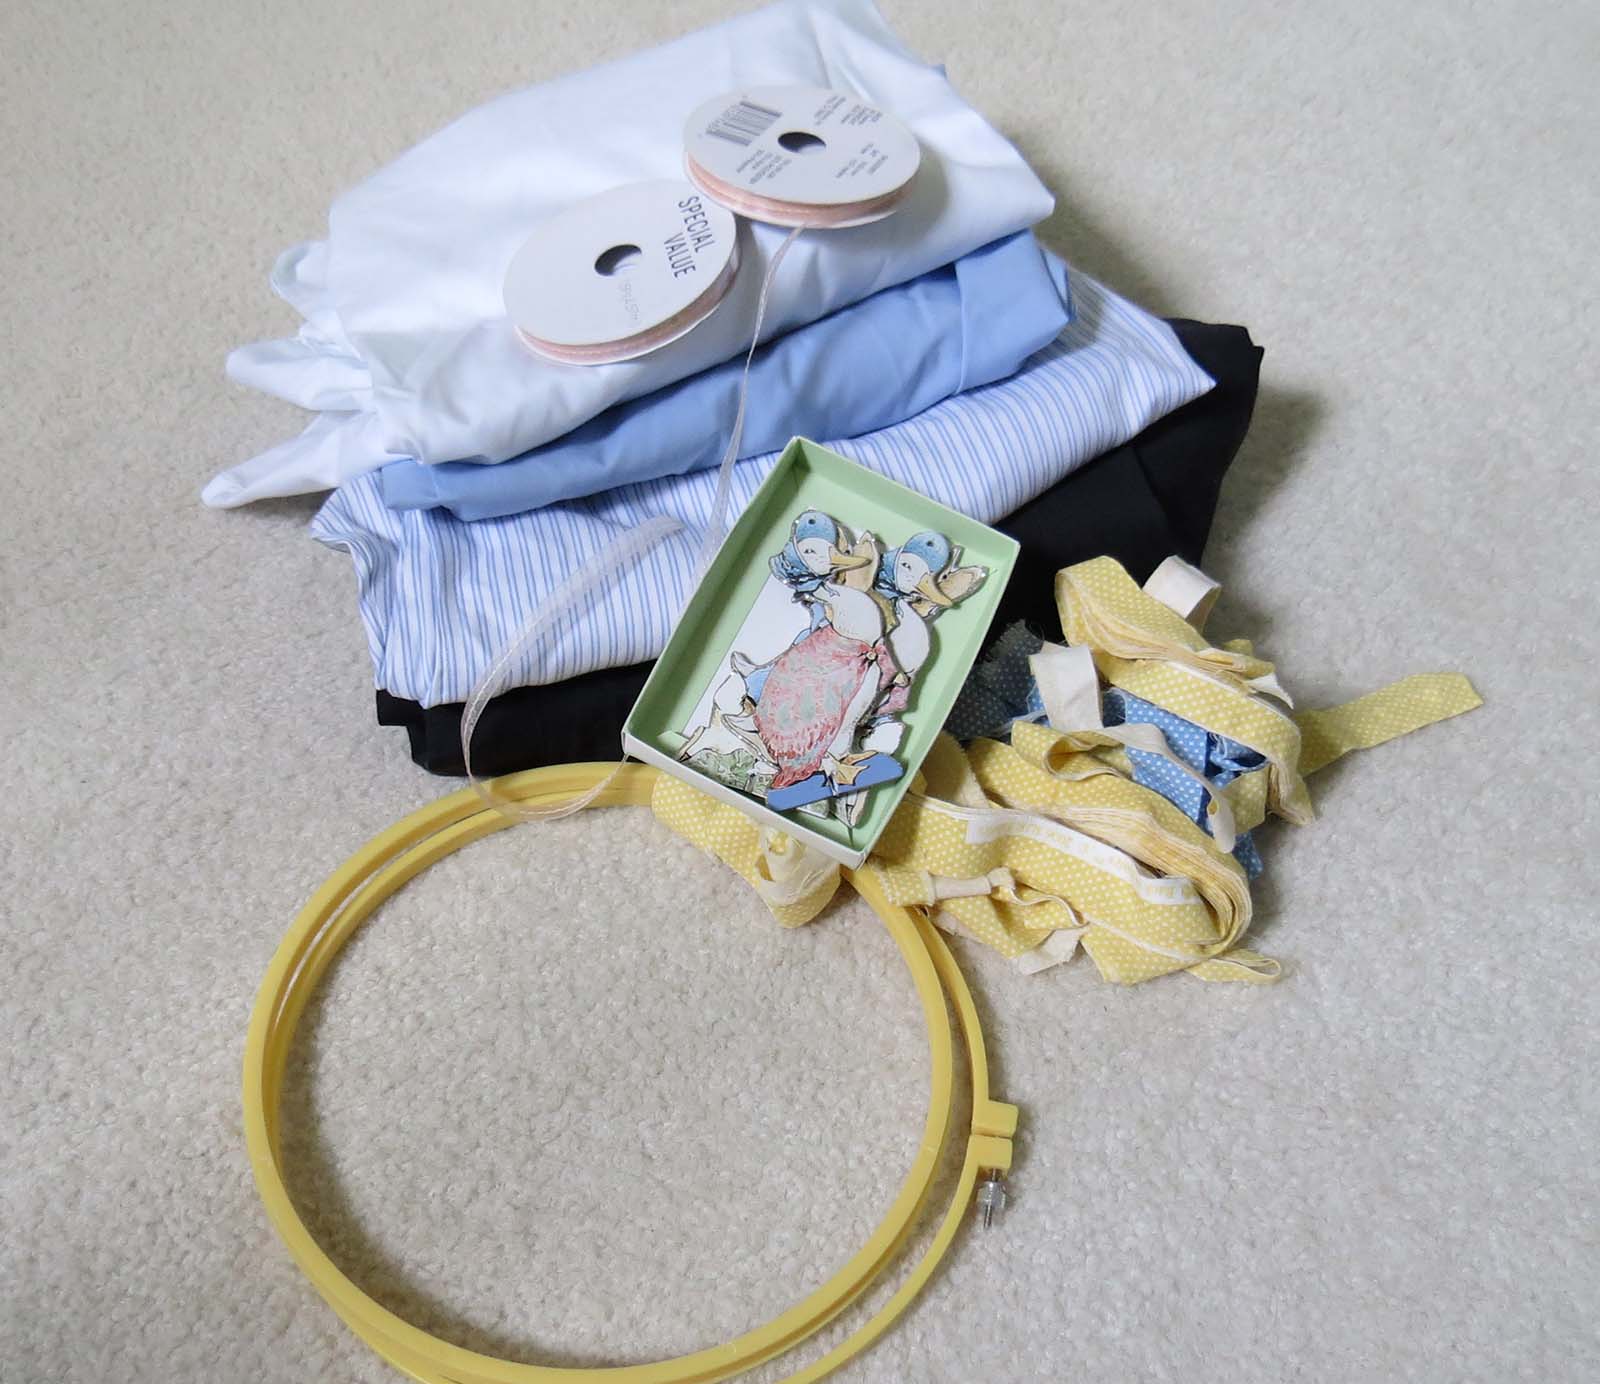
For this project I used:
- Cardboard cutout figures
- Ribbon
- Scrap material
- 2 key rings
- Twine/string
- Beads
- Embroidery hoop
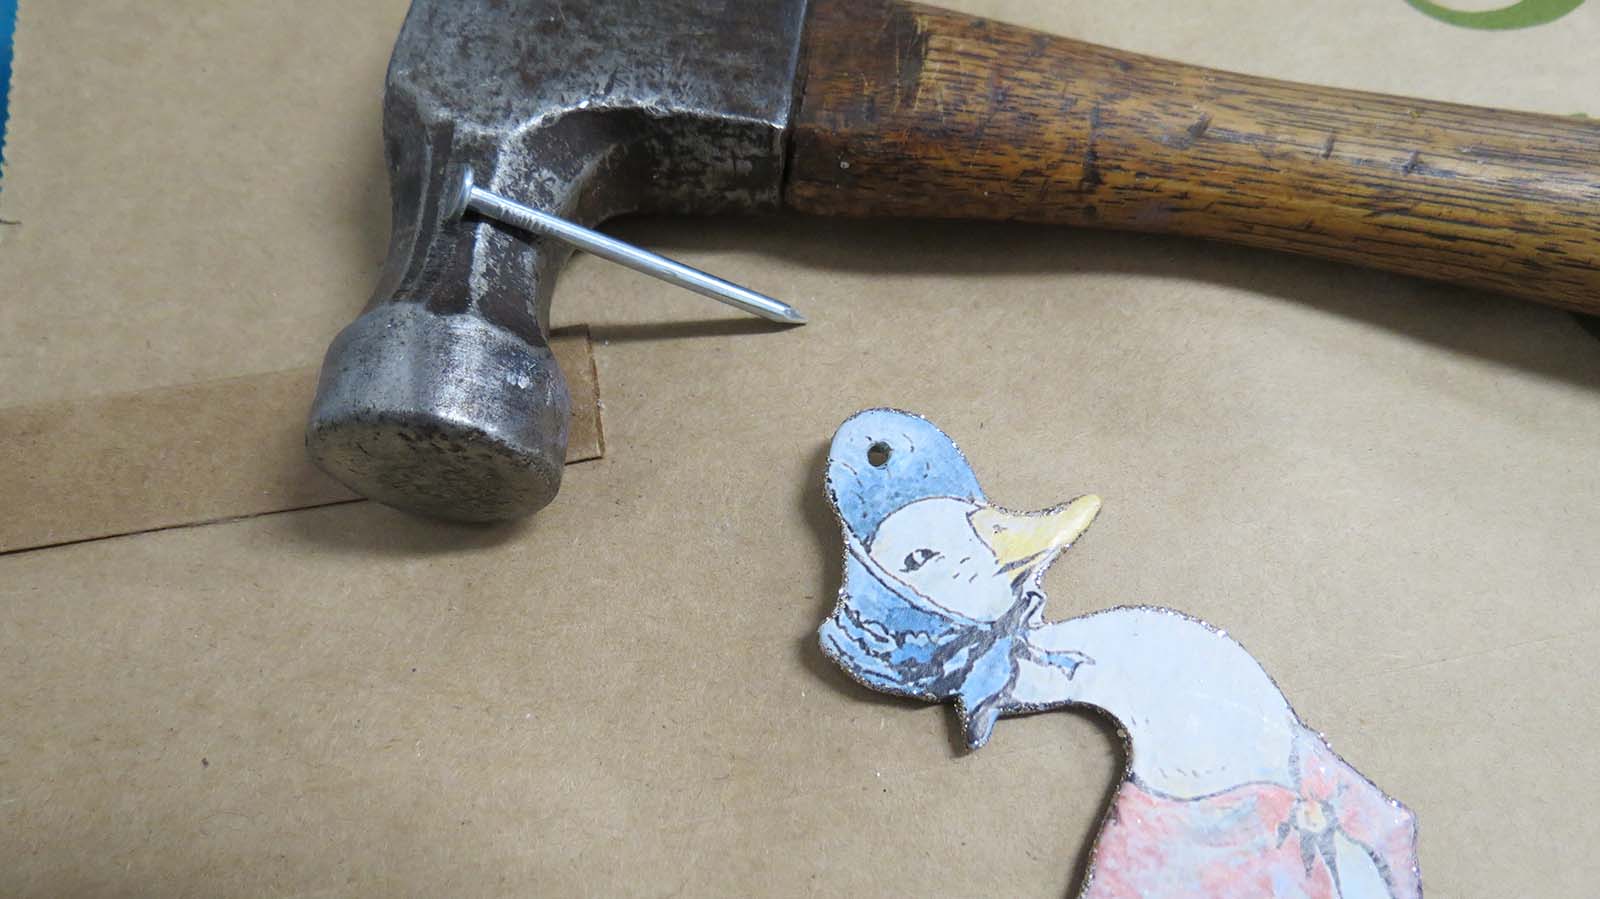
I started out nailing a hole through the top of the cardboard figures to allow them to be hung from the mobile.
Next, I trimmed 4 pieces of ribbon of equal lengths to thread through the cardboard.
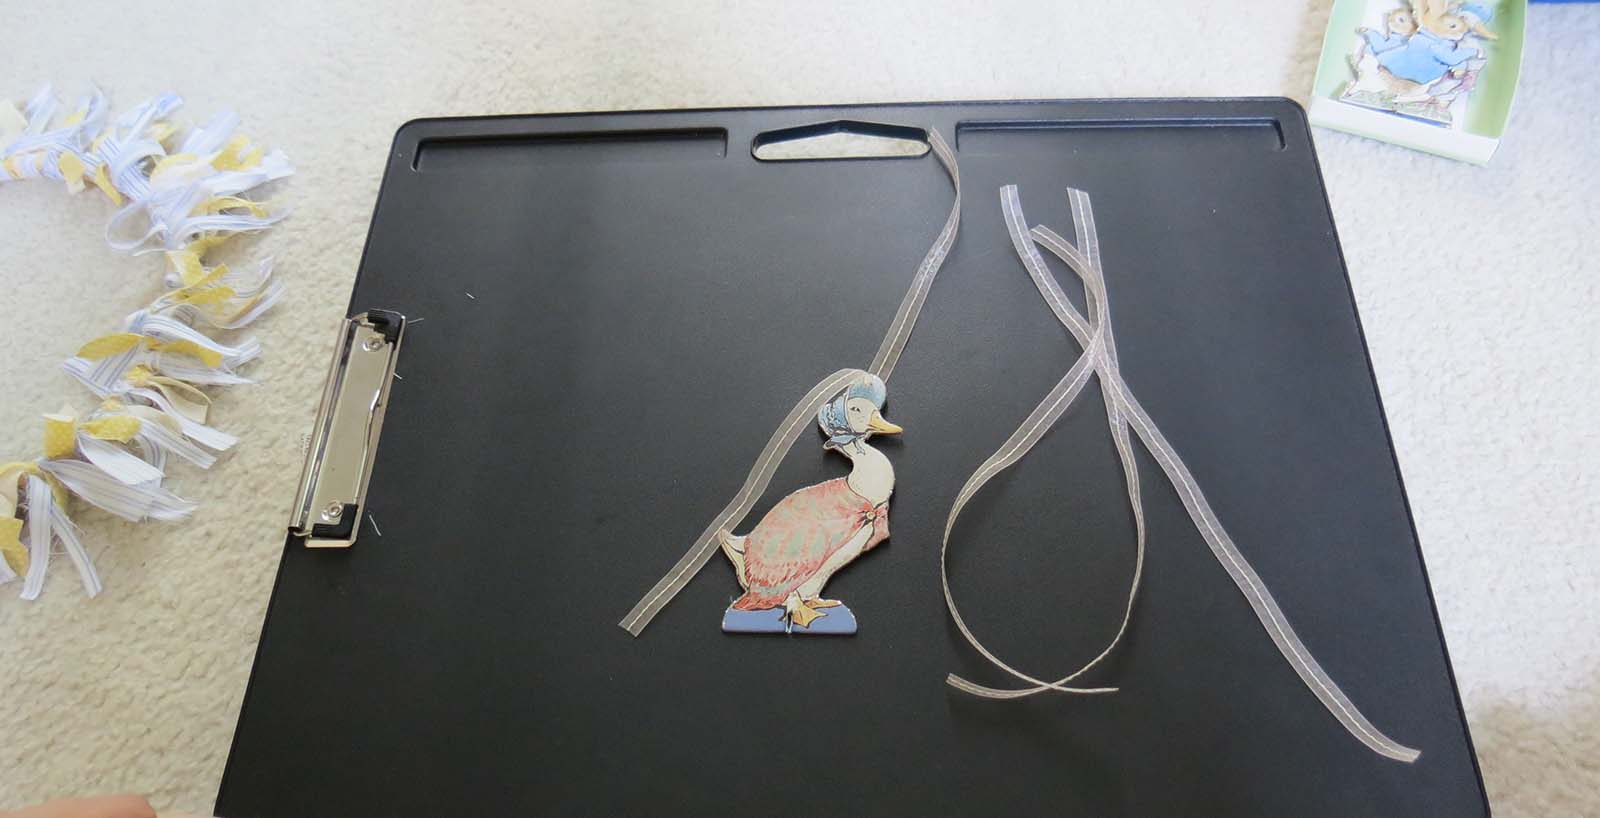
To dress it up a little and help the figures hang straight, I also added beads.

Setting those aside for the minute, I began decorating the embroidery hoop. This was to be the main structure for the mobile, and I only used the inside hoop. If you do not have an extra one lying around you can pick up a cheap one at the craft store. Since it will be completely covered the color and texture doesn’t matter for this process. I looped fabric around for my covering. If you would prefer to hot glue lace or add some other embellishment a wooden hoop may be a better choice. You can also use a foam wreath base, they are just much thicker and would not achieve the look I was going for on this project.
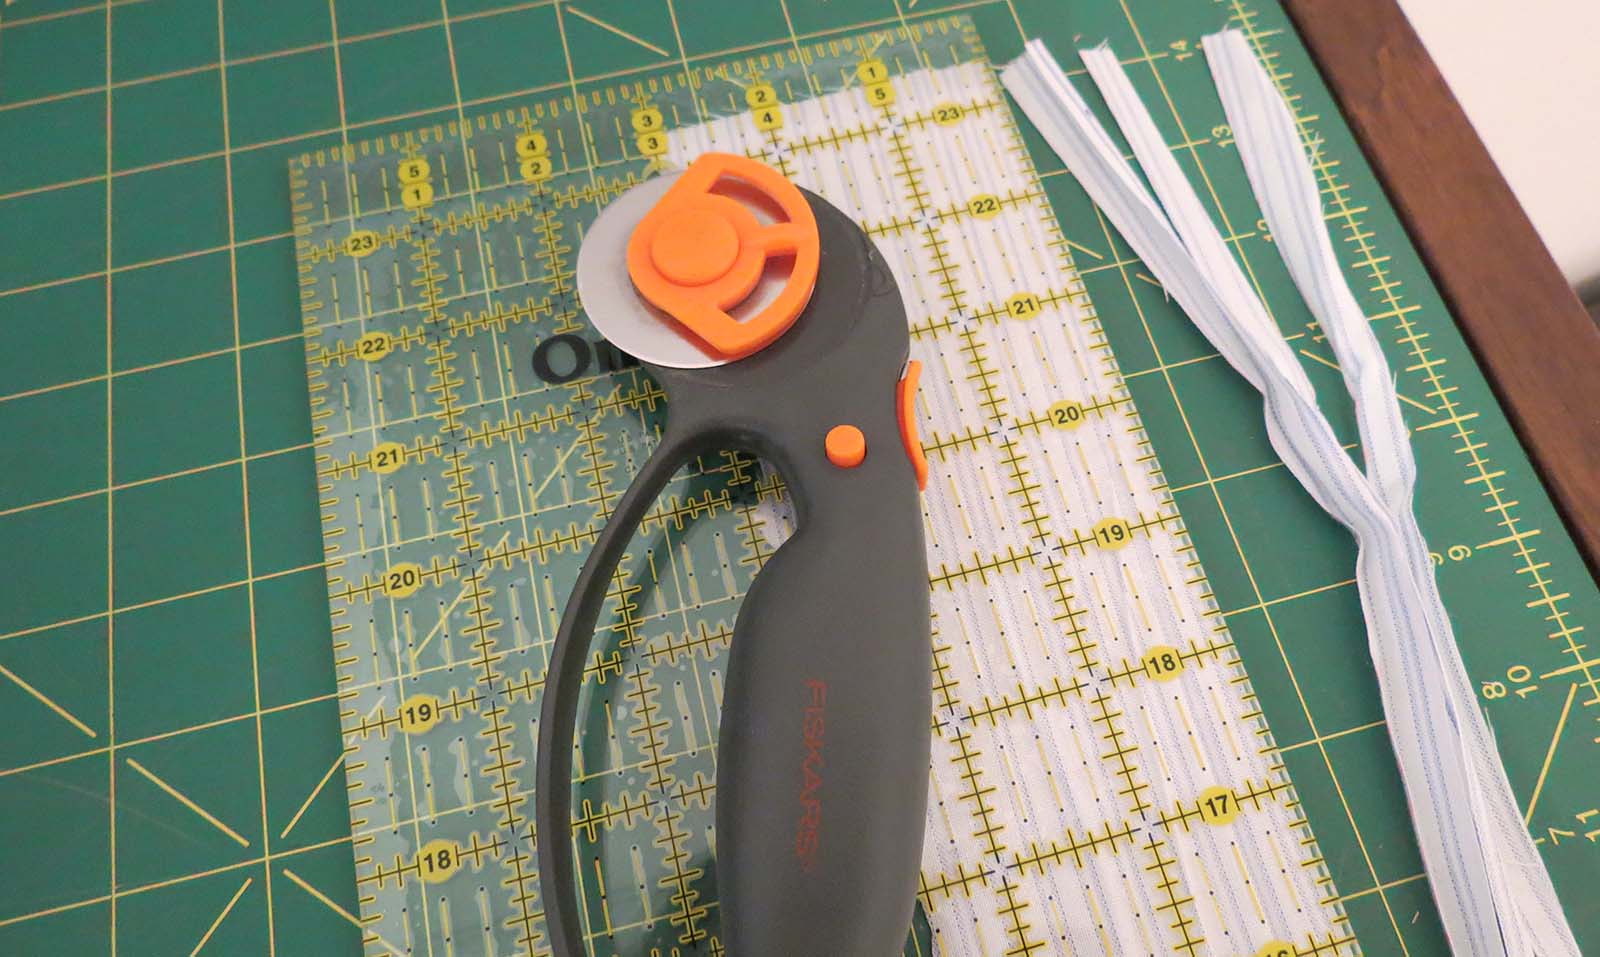
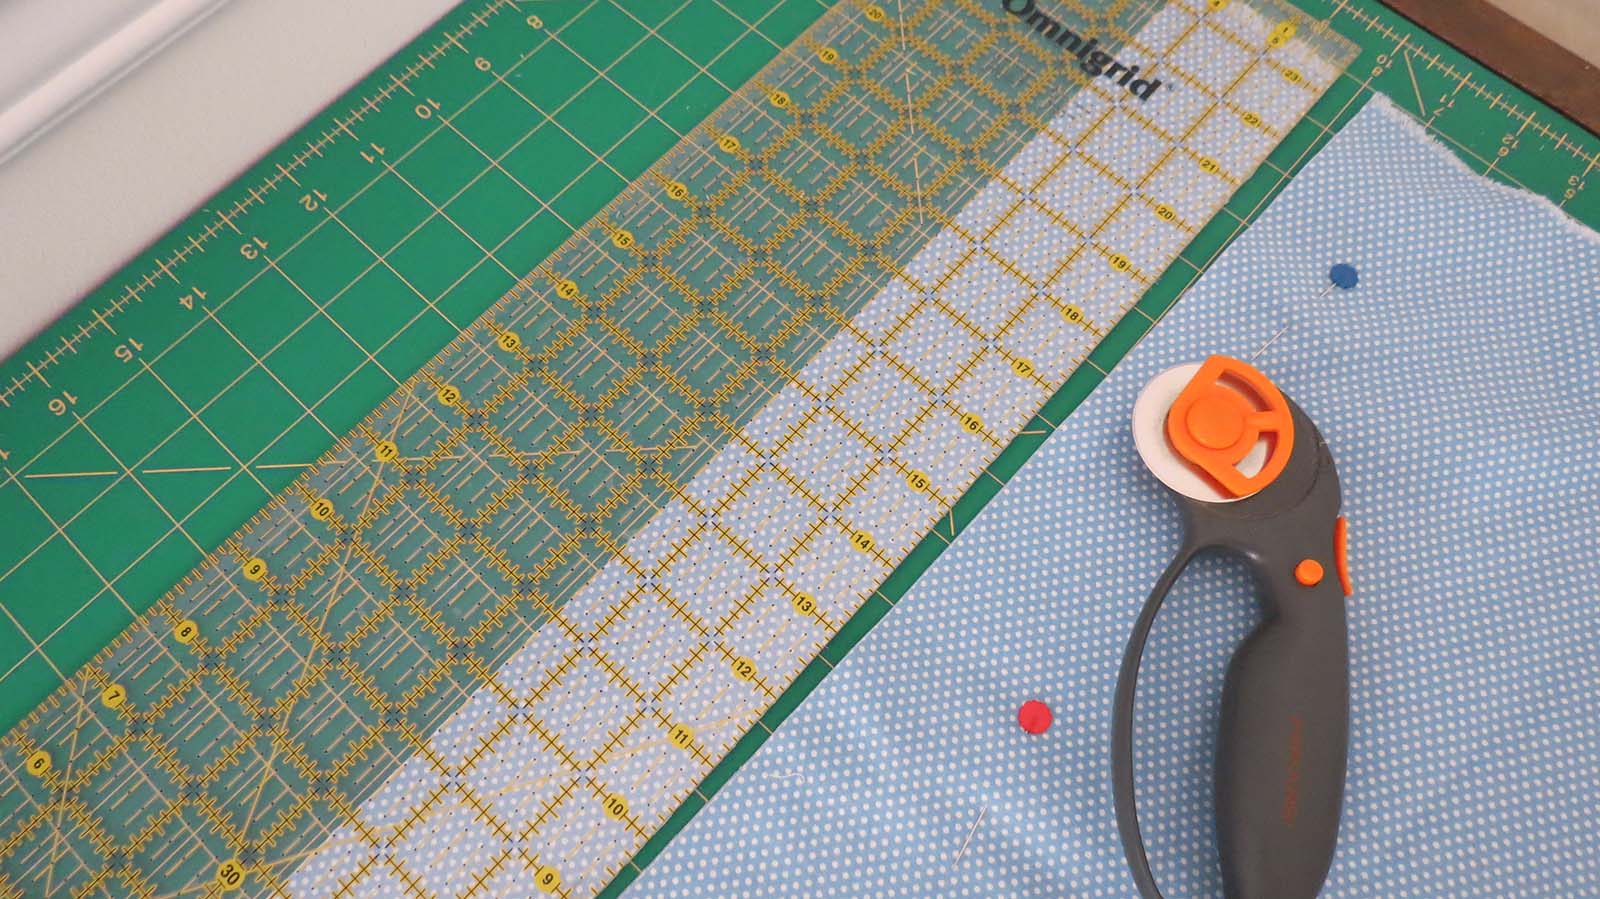
Using old scrap material I cut thin strips approximately 8″ long and 1/2″ wide. There is no need for this to be precise as a little differentiation in size adds to the texture and look. You can do this with scissors, but I prefer the rotary cutter for speed.
Take the strips and one-by-one loop them over the hoop base to fully cover the structure.
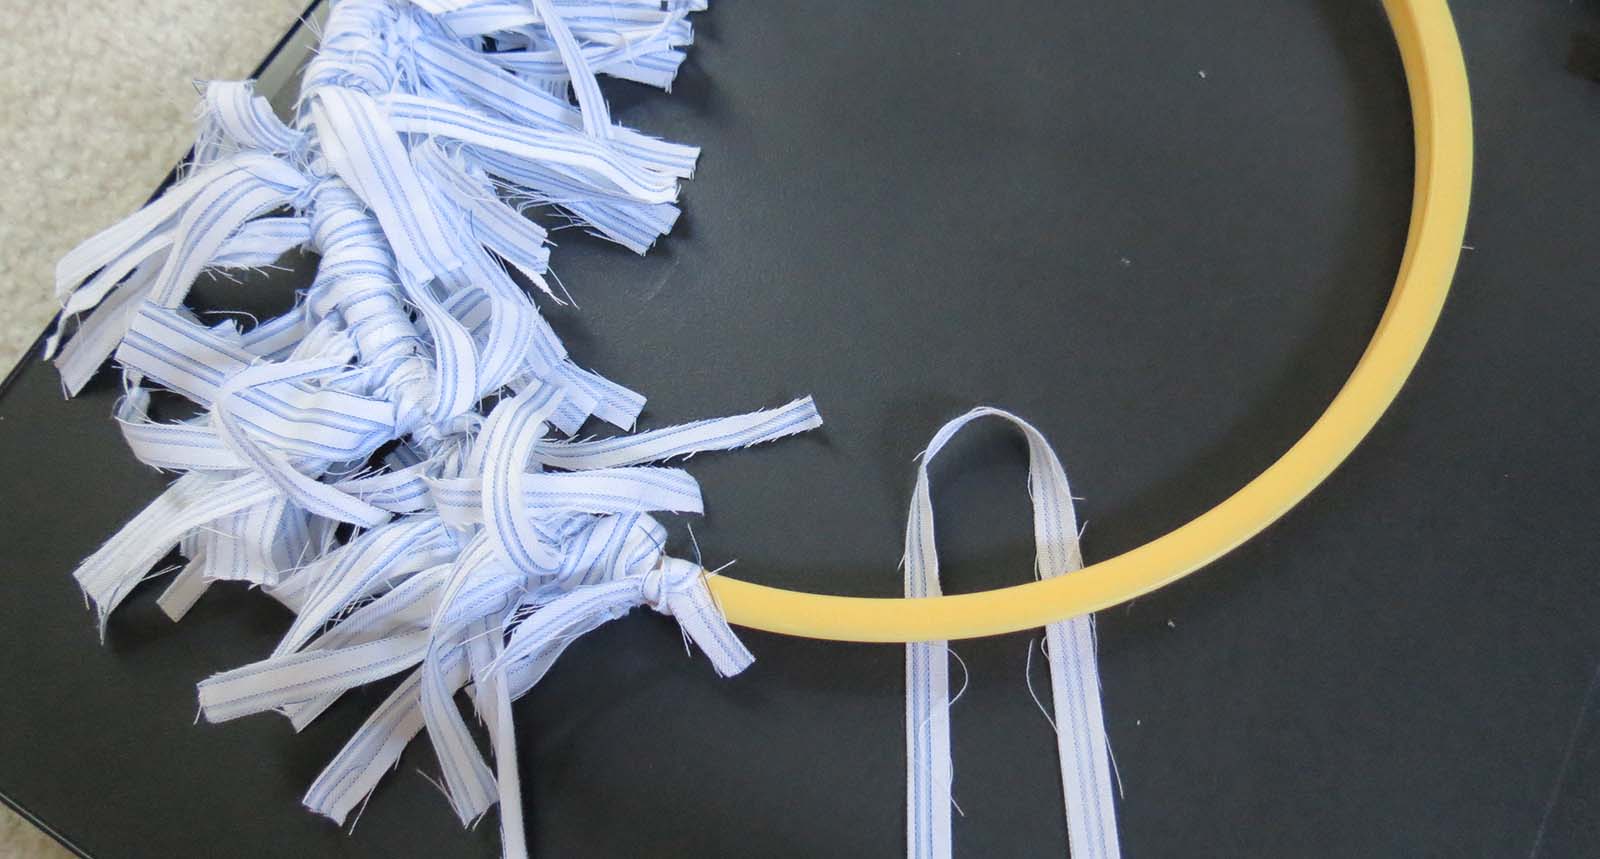
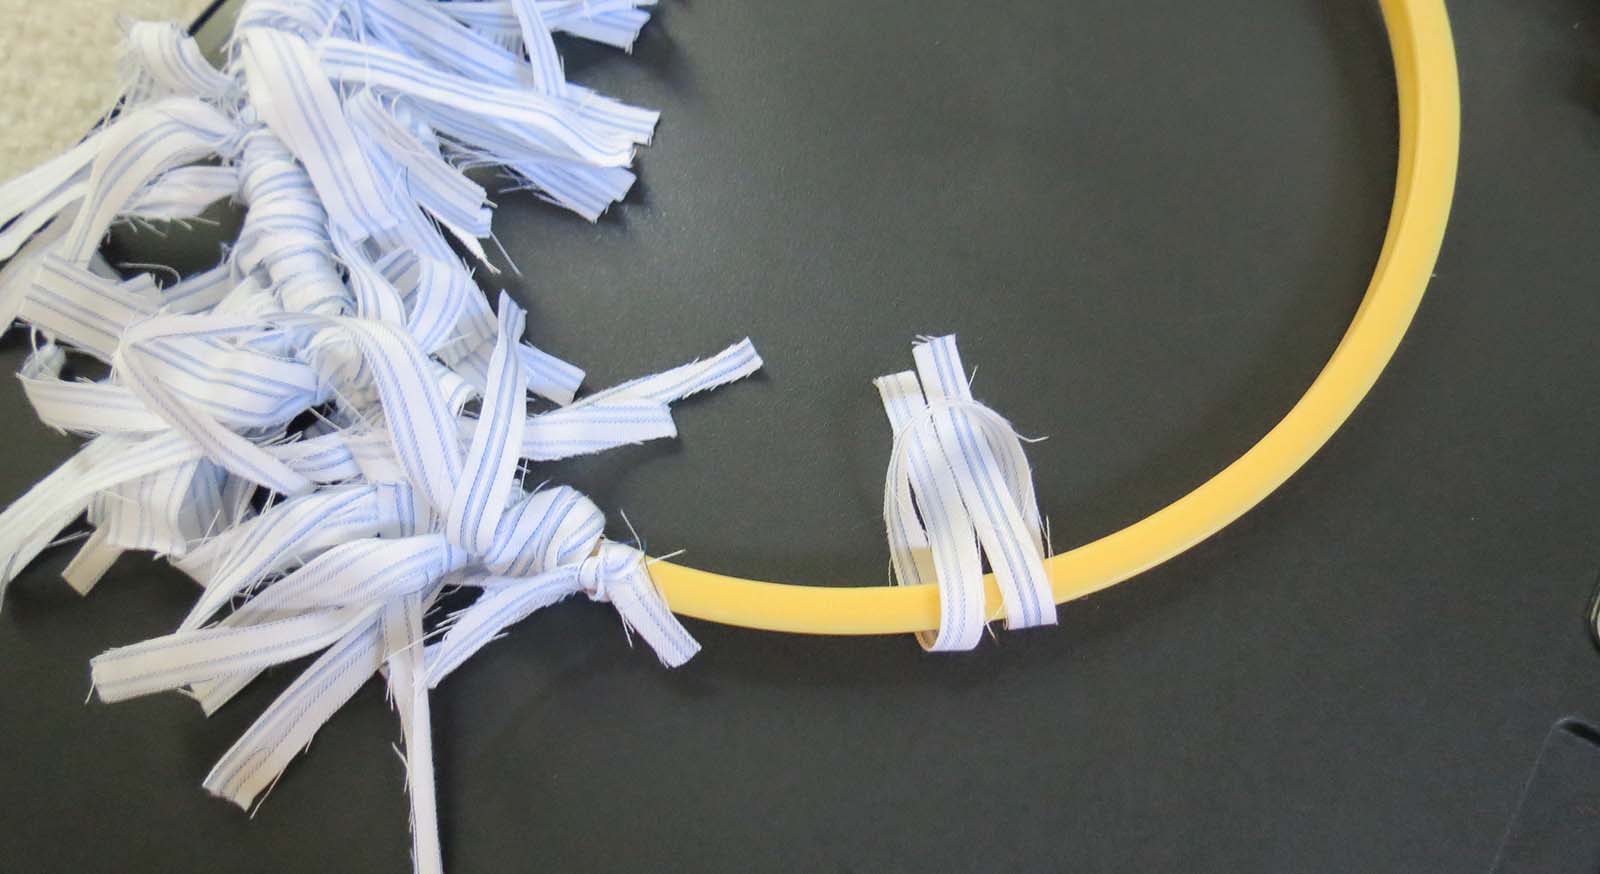

I ended up adding a second material, alternating colors for this final look.
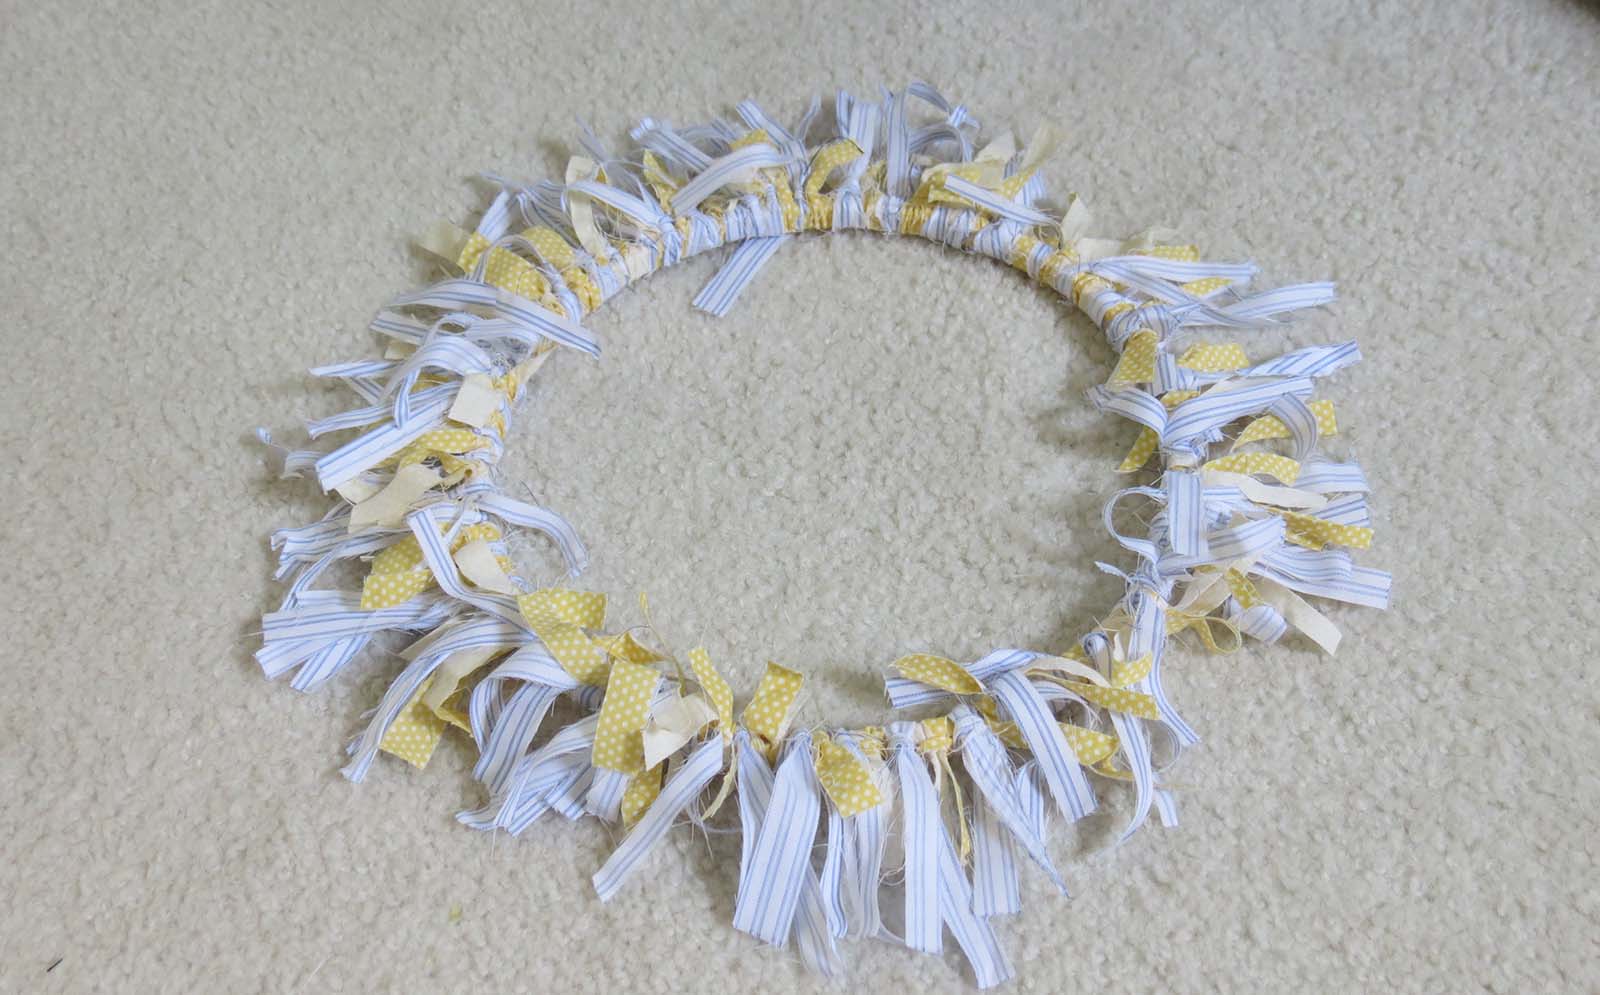
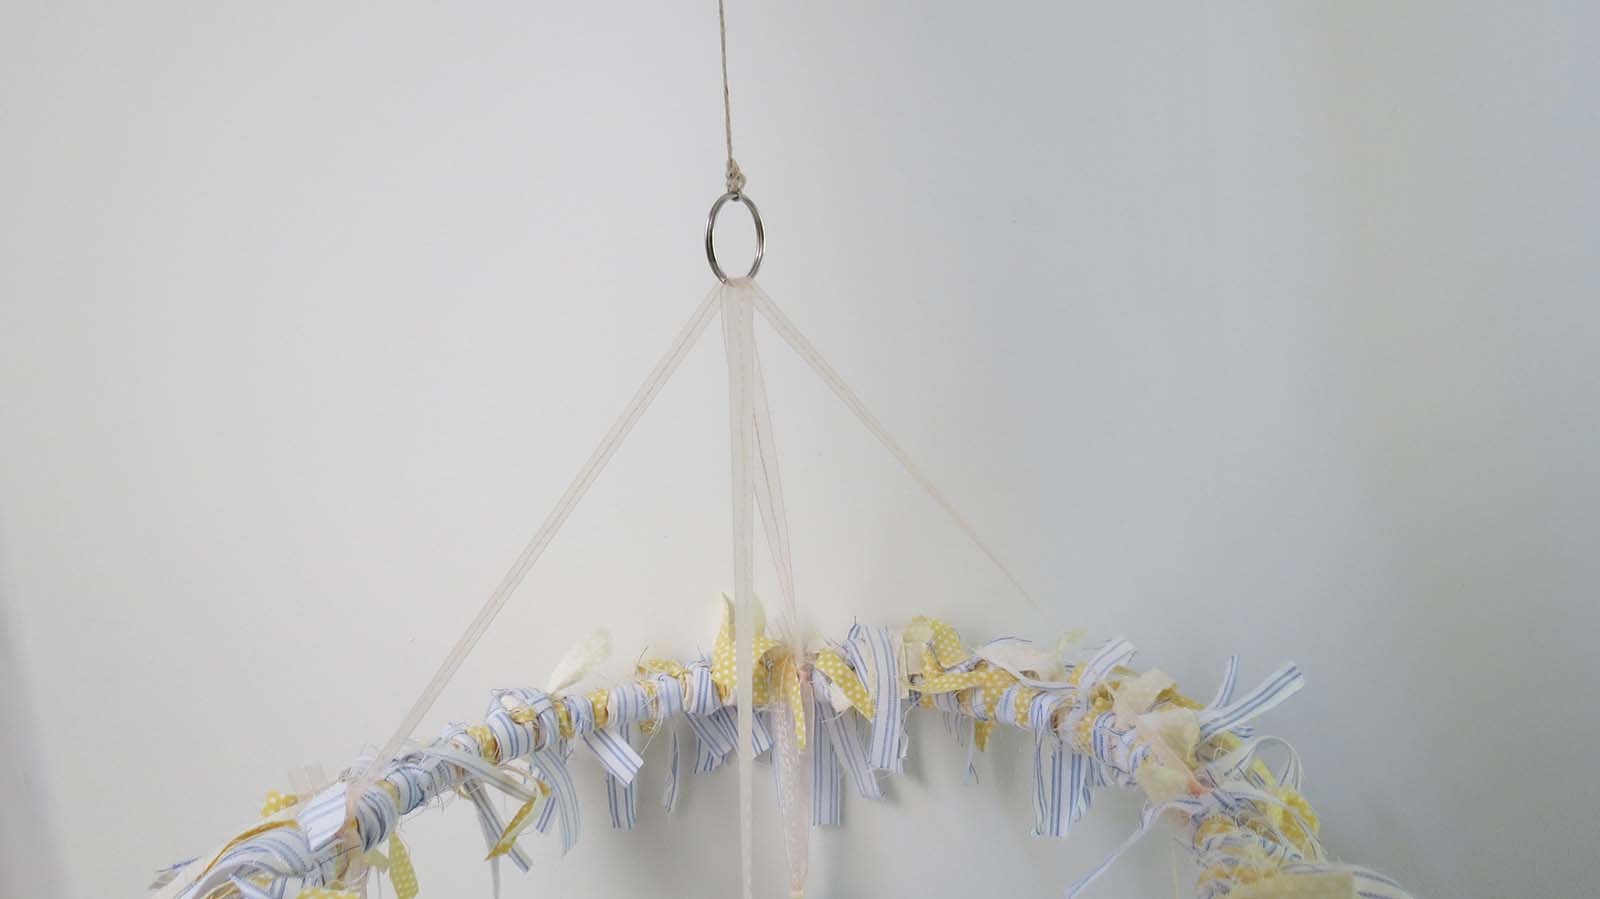
I then tied my figures around the hoop, spacing them evenly. To suspend, I cut 2 more pieces of ribbon about 18″ in length. These were tied to opposite sides (one ribbon vertically and one horizontally), and crossed in the middle threaded through a key ring.

To hang the mobile I tied a long piece of twine to the key ring.
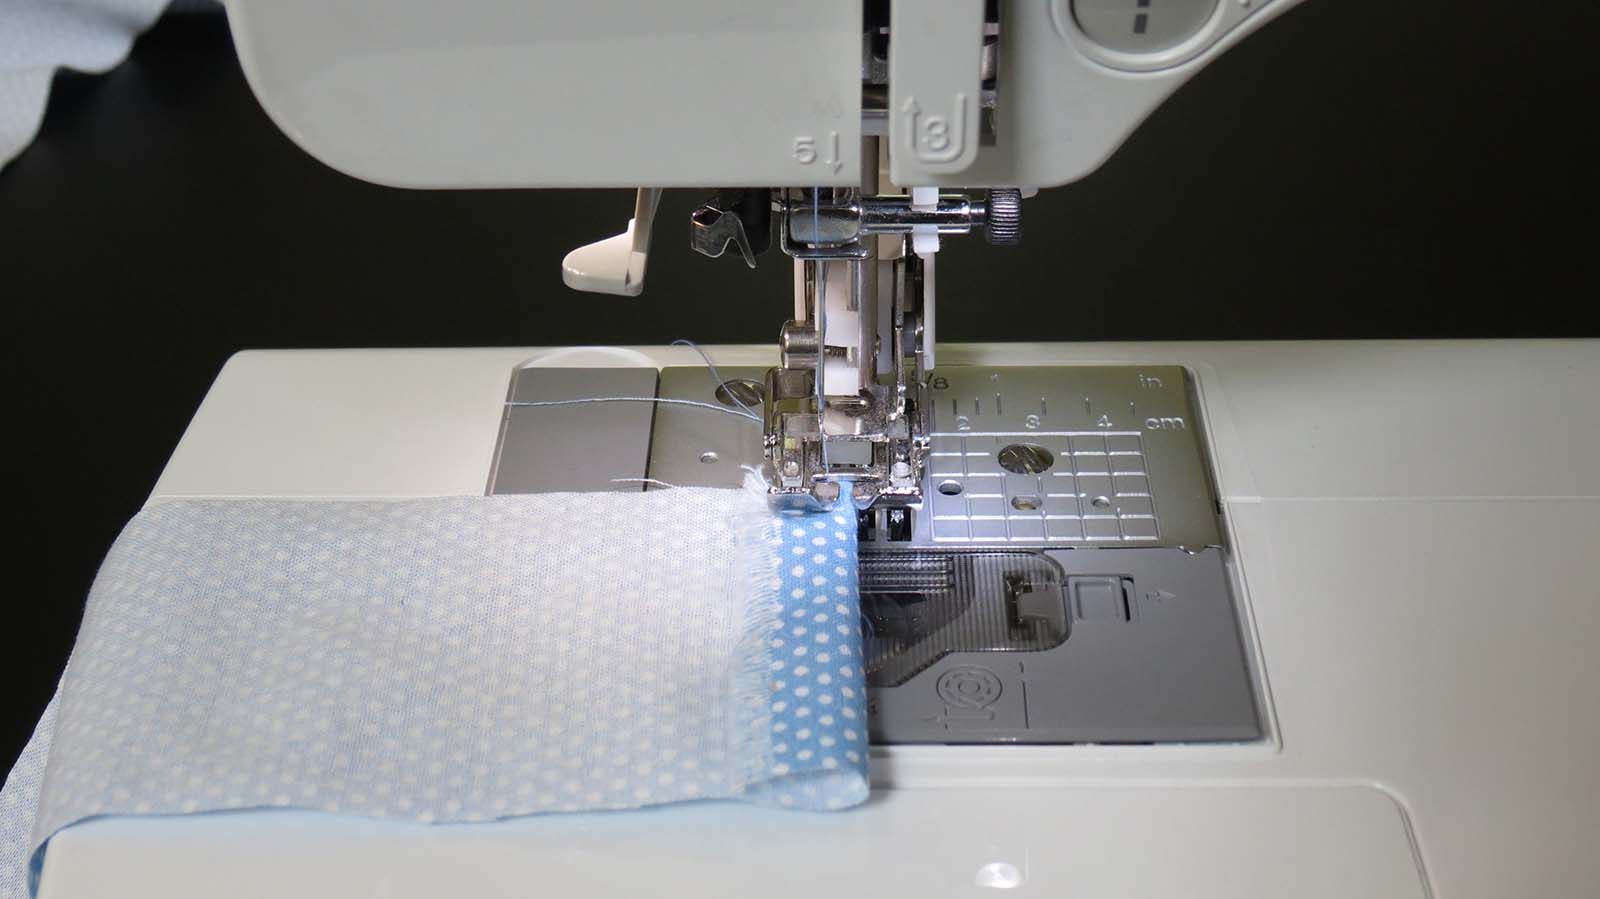
Since the unfinished twine is not the most beautiful feature, I once again went back to my scrap material and trimmed a long narrow piece, 2.5″ wide the length of the fabric (89″ in this case; that may seem excessive, but it can take quite a bit of material to get a full bunched/ruffled appearance).
To create the tube-like covering, I stitched down the ends to keep them from fraying and sewed one long seam down the side, right-sides together.

Getting the material right-side out was probably the most tedious task of this entire project. I tied another piece of twine (longer than the length of material) onto the end of a safety pin and worked it through to the opposite opening.
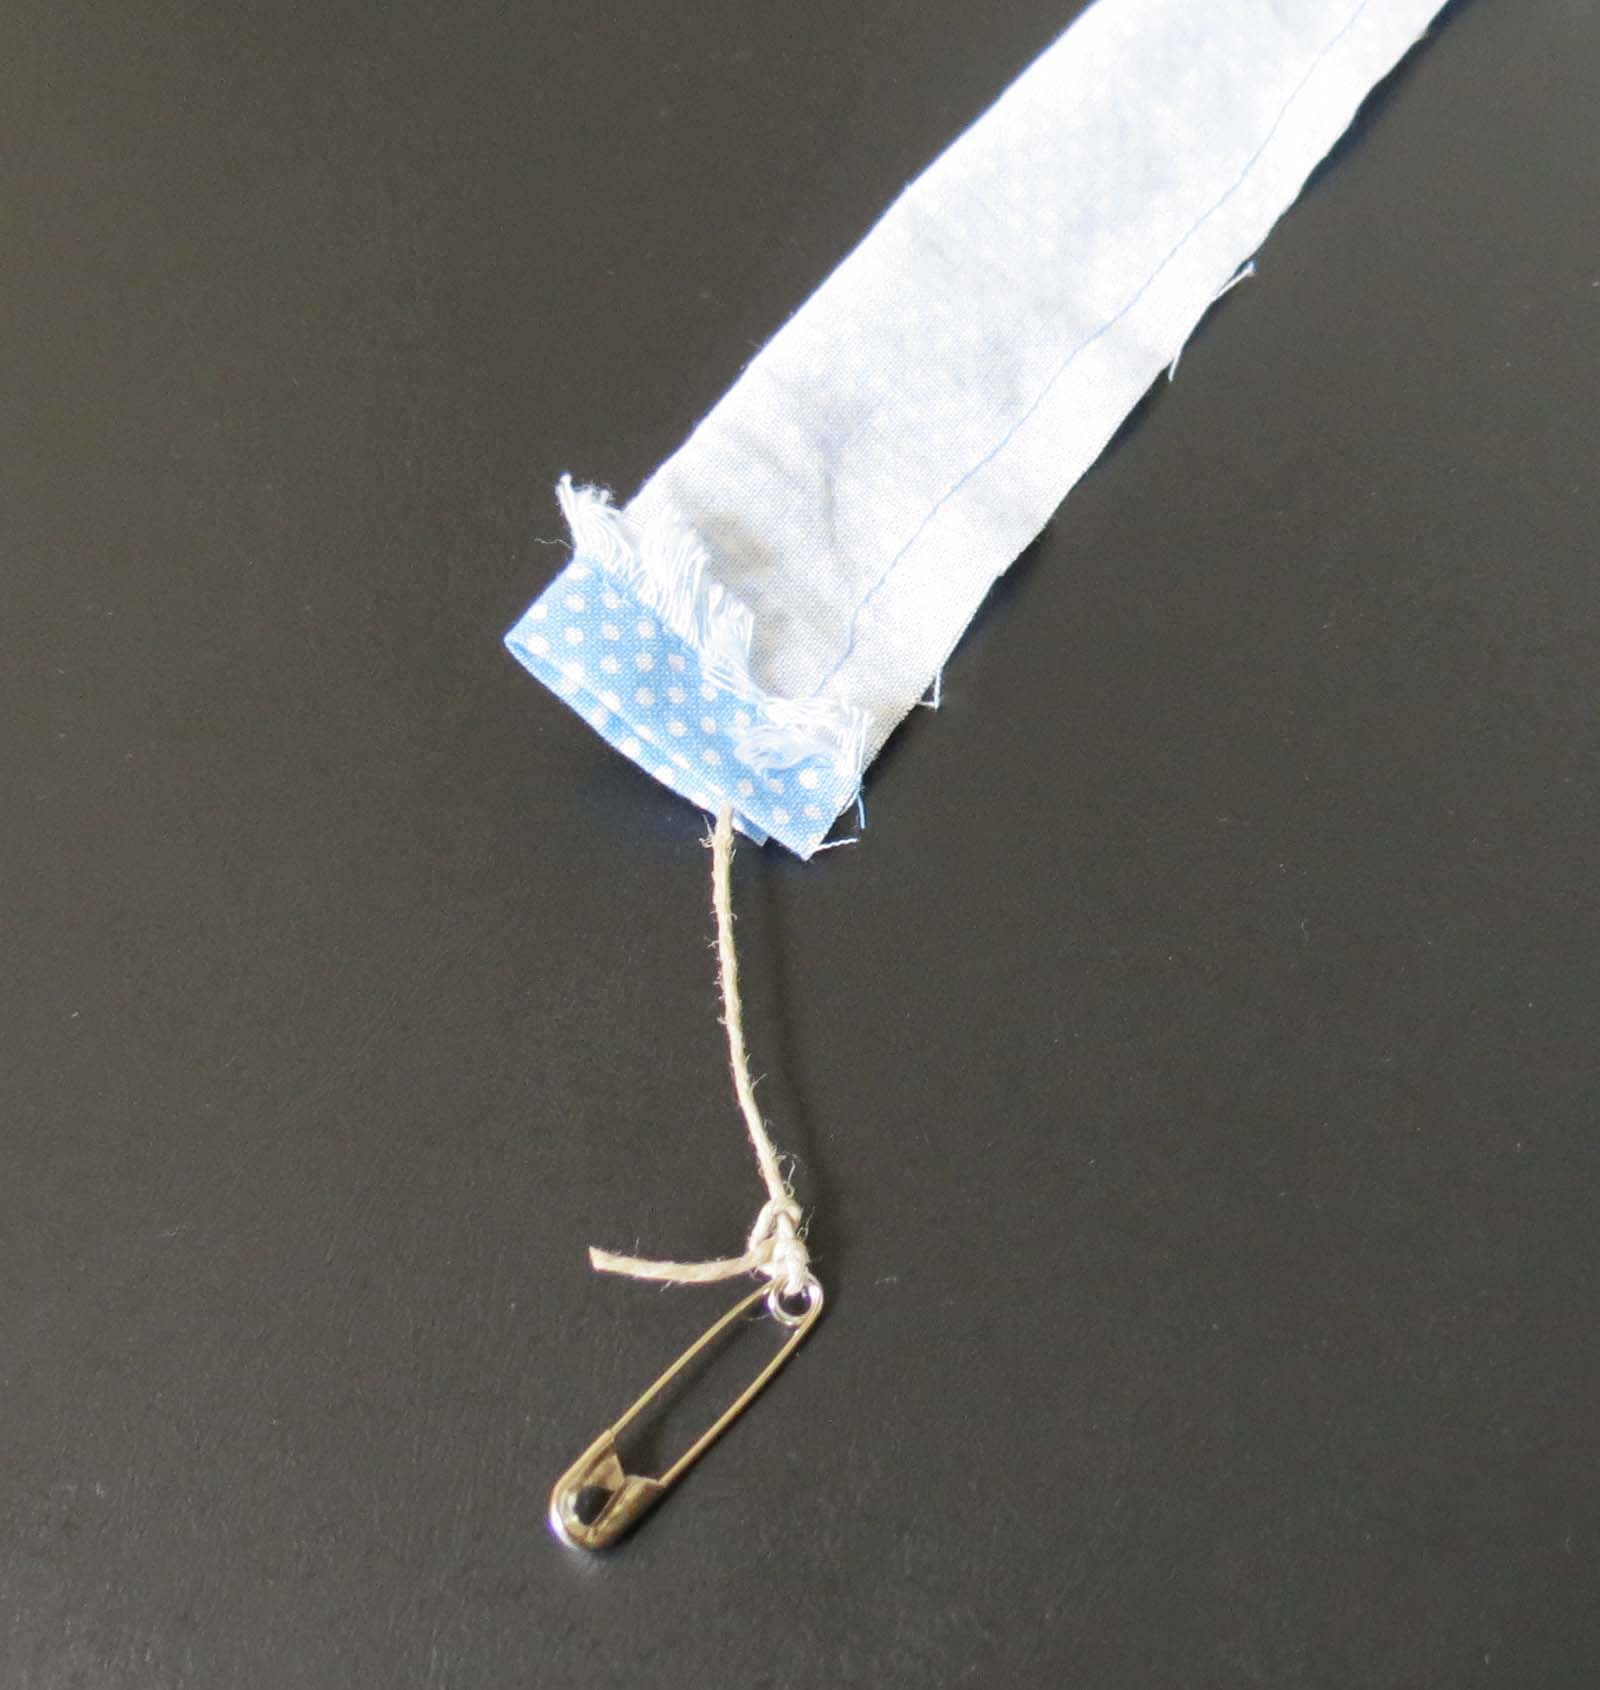
Next, I attached the pin to the edge of the material and began slowly working it back through. With a little patience, it was finally all right-side out.
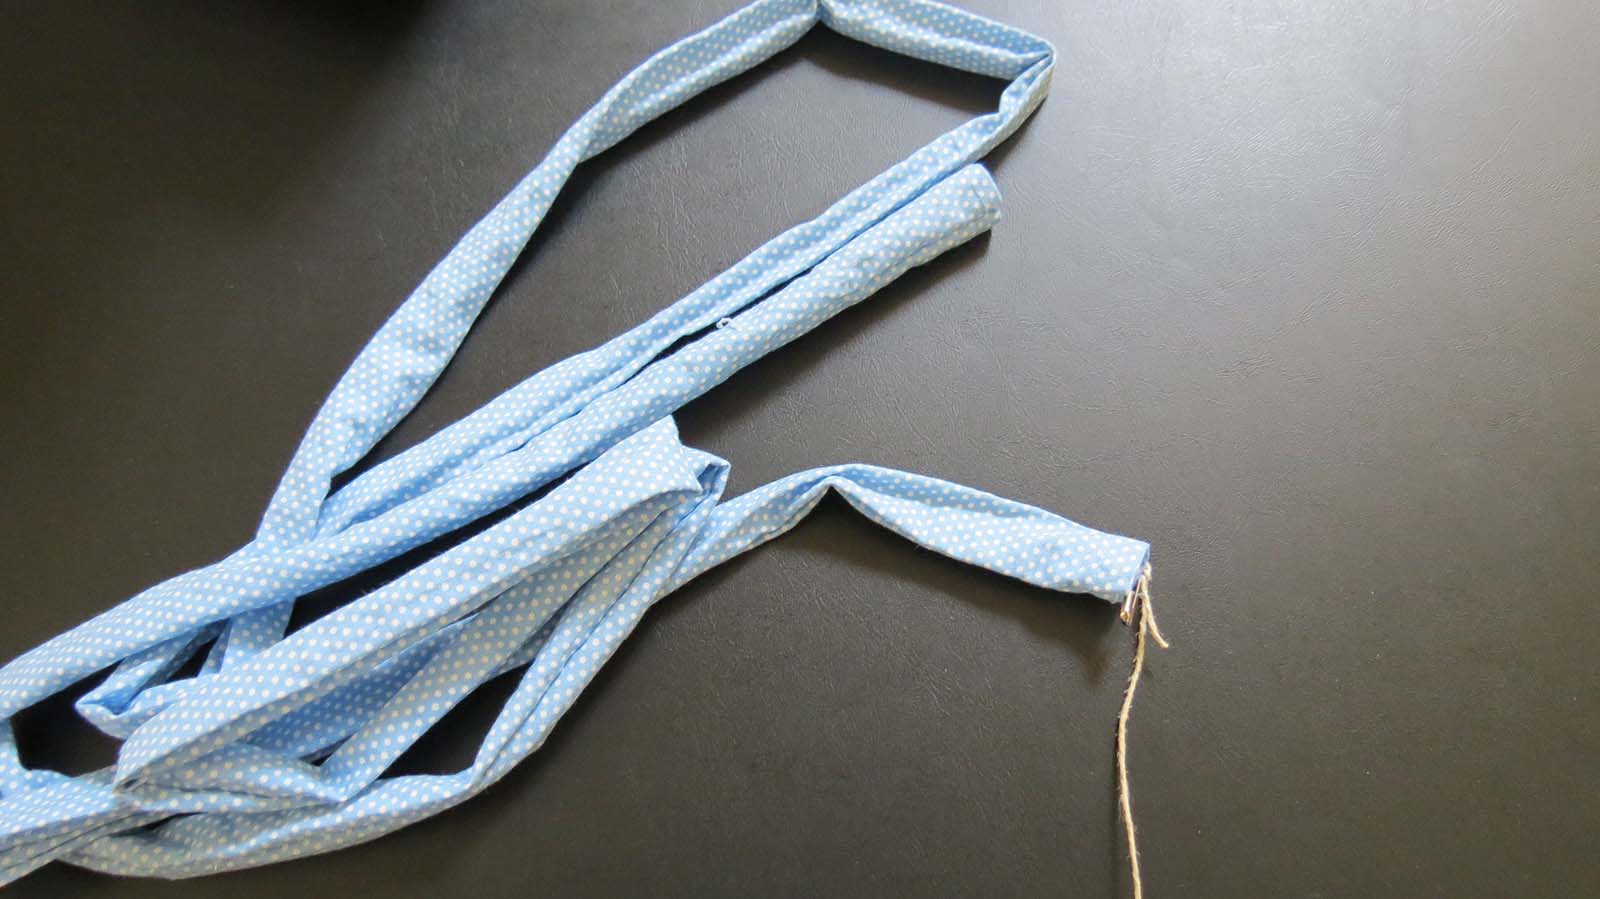
I took another safety pin, attached it to the end of the twine that was suspended from the hoop, and simply threaded it through the material tube.

I replaced the safety pin with another old key ring for easy hanging.

With a hook in the ceiling, I hung up the mobile from the top ring and adjusted the material to cover all the hardware. And here is the end result.
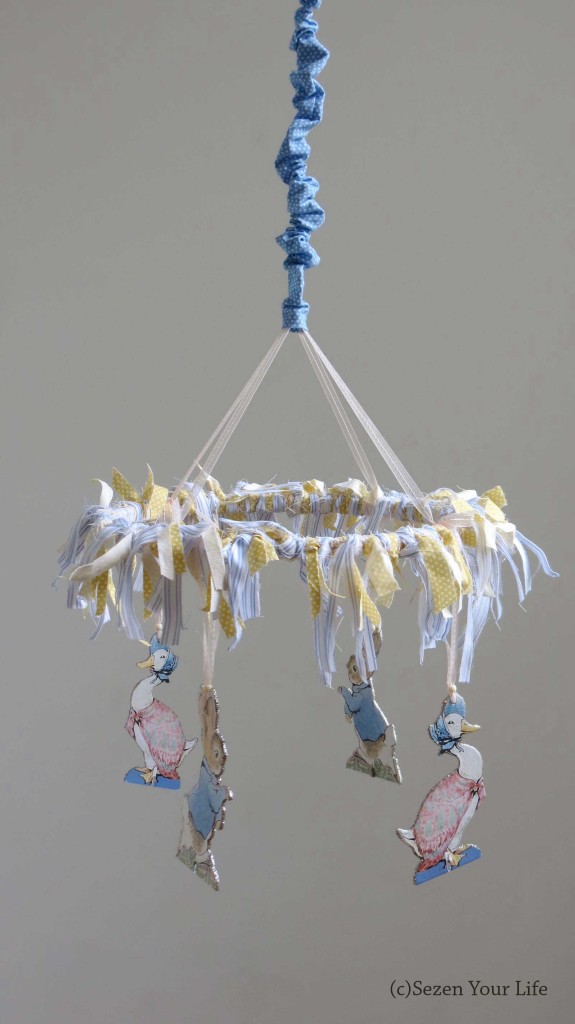
I was able to easily complete this in an afternoon and am happy with the pastel, shabby-chic type look. It was very inexpensive and easy to do; that’s my kind of mobile.
Try out the techniques for your own projects and let me know how it goes. Looping material strips to create a front door wreath is an easy project even the kids can do.
You Might Also Like:
- Baby Quilt, a Blanket of Blessings
- Top 5 Picks for Repurposing and Upcycling
- Repurposing Old Bed Sheets into a New Comforter

2 comments
This is amazing – what a clever re-purposing of materials. And a wonderful one of a kind mobile.
Author
Thank you, it was a lot of fun to make. Hopefully our daughter enjoys it too!